# Welcome!

Welcome to our EasyCatalog for Adobe InDesign support page!

[EasyCatalog](https://nousmedis.com/easycatalog/about-easycatalog/) is the most powerful and versatile plugin for automating catalogs, price lists, brochures, and other large-scale documents in [Adobe InDesign](https://www.adobe.com/products/indesign.html). [Nousmedis](https://www.nousmedis.com/) has been an official partner of [65bit software](https://www.65bit.com/) —the developers behind EasyCatalog— since 2009. We provide expert support, consulting, custom development, and training to help you make the most of this powerful solution.

At Nousmedis, we help you choose the most suitable licenses and modules to efficiently automate your catalogs, brochures, or magazines. If you prefer, we can handle the entire automation process for you — from setup to execution — train your design team to use our solution, and deliver the final documents in Adobe InDesign and/or high-resolution PDF format.

{% hint style="success" %}
Did you know that the **Nousmedis team** can take care of the programming and design of your catalog and teach your designers how to use the plug-in, so that you can start producing automated catalogs in record time?
{% endhint %}

{% embed url="<https://nousmedis.com/en/get-in-touch-with-us/>" %}

EasyCatalog is constantly evolving, and the list of features added with each release is growing exponentially. That is why we have decided to keep this page alive, which will serve as the most updated reference.


# First steps

Learn how to install and activate the EasyCatalog plug-in

Ideal for time-critical publications, EasyCatalog can dramatically speed up page make-up time and ensure your documents remain error free. Trusted by thousands of users in over thirty countries across six continents, EasyCatalog has quickly established itself as one of the most powerful and flexible database publishing solutions for [Adobe® InDesign®](https://www.adobe.com/products/indesign.html).

<table data-view="cards"><thead><tr><th></th><th></th><th></th><th data-hidden data-card-target data-type="content-ref"></th><th data-hidden data-card-cover data-type="files"></th></tr></thead><tbody><tr><td><strong>What is EasyCatalog?</strong></td><td>A catalog automation plug-in for Adobe InDesign</td><td></td><td><a href="/pages/qIaku2IZpcpUAOfu9Bm8">/pages/qIaku2IZpcpUAOfu9Bm8</a></td><td></td></tr><tr><td><strong>Trial version</strong></td><td>Use EasyCatalog without any restrictions for 30 days</td><td></td><td><a href="/pages/JFbHDwRSaRtquUpFk5Ha">/pages/JFbHDwRSaRtquUpFk5Ha</a></td><td></td></tr><tr><td><strong>Purchasing and activating EasyCatalog</strong></td><td>Ensure your plug-in is correctly activated</td><td></td><td><a href="/pages/BY1KtjcrHrhrCfPKFFo5">/pages/BY1KtjcrHrhrCfPKFFo5</a></td><td></td></tr><tr><td><strong>Transferring an activation</strong></td><td>Use EasyCatalog in other computer</td><td></td><td><a href="/pages/IlYpKY0JM4tUmArz8AZq">/pages/IlYpKY0JM4tUmArz8AZq</a></td><td></td></tr><tr><td><strong>Editing documents without EasyCatalog</strong></td><td>How to edit EasyCatalog created documents</td><td></td><td><a href="/pages/I7548U5WWGdK9eVKivvh">/pages/I7548U5WWGdK9eVKivvh</a></td><td></td></tr></tbody></table>


# What is EasyCatalog?

EasyCatalog is the most complete catalog automation plug-in for Adobe InDesign

**EasyCatalog** is a complete database publishing solution, and provides a bi-directional link between data from a variety of sources to content in an **InDesign** document. Any changes made in the document may be reflected back to the original source of the data.

Document content is constantly tracked, enabling you to determine which records and fields are placed. Document tracking offers a number of benefits:

## 1. Increased productivity

* Data can be acquired from a variety of data sources quickly and efficiently. Time is not spent re-keying or importing data.
* Errors are reduced, as data on the page is coming directly from the data source without being re-keyed.
* Automatic error detection: EasyCatalog can highlight all fields that differ to the original data, and either automatically correct them or highlight them for manual correction in the document.
* Data can be filtered and grouped to only show data relevant to a particular section of the publication, for instance. Filtering your data reduces the amount of time spent searching through data that is not relevant to the task you’re currently performing.
* Data that has been changed on the database can be updated in the document instantly – ideal for deadline-critical publications.
* Records can be dragged and dropped to the page using pre-defined templates stored in libraries. Placeholders in the templates show EasyCatalog where and how each field should appear, and complex page layouts containing live linked data can be constructed in seconds.

## 2. Powerful pagination facilities

* EasyCatalog contains of wealth of facilities for both data driven and design driven publications.
* Formatting may be applied to fields, ensuring that all prices, for instance, appear in a consistent format throughout the publication. Any prices that do not obey these formatting rules will be highlighted as part of the error-checking procedure.
* Library styles may be defined for records, ensuring records appear in a consistent manner. See **Templates and Libraries.**
* EasyCatalog offers powerful tabular data functionality, allowing tables to be created from your data at the click of a button.
* Using the optional pagination module, EasyCatalog can automatically create a flow of several hundred pages.
* EasyCatalog leverages the typographical and layout features of InDesign, so the layout and style of your publication doesn’t have to suffer.

## 3. Reduced cost of ownership

* EasyCatalog is a front-end for existing databases – you purchase the plugin and we, or a systems integrator, provide Data Provider plug-ins to access your data. Data can be imported from a delimited file (such as a comma or tabdelimited file), ODBC database, Excel files, a PIM[^1] or an XML file.
* As there is no new *production* database to integrate with, there will be no integration issues, or unwanted database licenses.
* As EasyCatalog is tightly integrated with Adobe InDesign, there is no new application environment to learn.

[^1]: Product Information Manager


# 30 days trial version

Use EasyCatalog without any restrictions for 30 days

Your EasyCatalog plug-in will run in demo mode until a valid registration code is entered. The EasyCatalog trial is valid for thirty days from the date it is first run.

Thank you for taking time to evaluate EasyCatalog – if you have any questions or would like further information, please visit our web site at [www.nousmedis.com](https://nousmedis.com/en/).

{% hint style="info" %}
We are here to help you with during your evaluation so if you have any questions whatsoever, please contact us using the [support form](https://nousmedis.com/en/get-in-touch-with-us/) of our website. We aim to respond to all enquiries within one working day of receiving them.
{% endhint %}

Whilst you are evaluating EasyCatalog, the `About EasyCatalog` dialog will appear each time you launch InDesign, showing the number of days remaining in your trial period.

<figure><img src="/files/vUuhZQsr7w8e7dJW7eb0" alt="About EasyCatalog"><figcaption><p>Dialog box "About EasyCatalog" showing demo mode expired</p></figcaption></figure>


# Purchasing and activating EasyCatalog

Please, contact us so that we can advise you on the version and modules of EasyCatalog that best suits your needs

## Purchasing EasyCatalog

Nousmedis will send you a purchase quote via the email address you provide, which will be valid for 30 days. You will need to return the signed quote to us along with your company's tax information so that we can issue the corresponding invoice.

{% embed url="<https://nousmedis.com/en/get-in-touch-with-us/>" %}

#### Send us the transfer receipt

You must send us proof of the bank transfer for the amount of the invoice, and within 24 hours you will receive the serial numbers you have purchased by email: these can be activated in around 5-10 minutes.

{% hint style="info" %}
A serial number can be activated on **only one computer**; therefore, you will need as many licenses as computers you want to use.
{% endhint %}

## Activating EasyCatalog

Following purchase, you will be supplied with a serial number for each of the modules that you have purchased. EasyCatalog uses internet activation to validate your license codes, which typically takes a few seconds to process. Once registered, all limitations of the demo version will be lifted.

Internet activation offers many advantages, including the ability to purchase additional licenses at a later date whilst retaining the same serial number.

{% hint style="success" %}
Internet activation also helps to ensure that you do not unintentionally violate your EasyCatalog license agreement.
{% endhint %}

To activate, select `About EasyCatalog` from the `InDesign` application menu (on the Macintosh), or from `Help` menu (on Windows).

<figure><img src="/files/vUuhZQsr7w8e7dJW7eb0" alt="Cuadro de diálogo Acerca de EasyCatalog"><figcaption><p>About EasyCatalog dialog box</p></figcaption></figure>

When the `About EasyCatalog` dialog appears, press the `Activate` button to enter the serial numbers you have been issued. The serial number should be entered exactly as it appears in your order confirmation email, including the hyphens.

If you have an active internet connection, your serial number will be validated on our servers and your software will activate after a few seconds.

{% hint style="danger" %}
Try copying and pasting the serial number from your order confirmation email into the activation dialog.
{% endhint %}

## Activating EasyCatalog without an Internet connection

If you do not have an active internet connection, alternative options will be offered after you have entered your serial number:

* Activation using a web-browser on your InDesign machine.
* Activation using a web-browser on another machine (with a valid internet connection).

On-screen instructions will step you through the above processes: the website you are sent to will issue you with an `Activation Code`, which should be entered into the `Manual Activation wizard` that appears.

<figure><img src="/files/FrkNHkiqzX5g9ZNmzjyS" alt="Activación offline"><figcaption><p>Manual activation wizard</p></figcaption></figure>

## Common activation errors

<details>

<summary>An attempt was made to activate an unknown serial number</summary>

If you have recently purchased this serial number, please wait around 15 minutes before trying again. If the problem persists, please contact your vendor. The most common cause of this error is entering the serial number incorrectly. Please ensure that you enter the complete serial number (including all dashes). EasyCatalog serial numbers do not contain the letters ‘I’, ‘O’, ‘U’ or ‘Z’ as these can be confused for other characters.

Sometimes, if you’ve recently purchased the serial number through our web store, you may need to wait 10 - 15 minutes before the serial number will activate.

</details>

<details>

<summary>An attempt was made to activate a blacklisted serial number</summary>

The serial number you have entered has been blacklisted and cannot be used to activate EasyCatalog. Please [contact us](https://nousmedis.com/en/get-in-touch-with-us/) for further information.

</details>

<details>

<summary>An activation attempt failed due to the maximum number of allowable activations being met</summary>

The number of allowable activations for this serial numbers has now been reached and this EasyCatalog serial number cannot be activated. If you are installing onto a new machine, please ensure that you de-activate your serial number and wait 10 - 15 minutes before attempting to activate on your new machine. See [Transferring an Activatio](/getting-started/1.-first-steps/transferring-an-activation)n.

</details>

<details>

<summary>An error occurred trying to install the eSellerate engine</summary>

The e-commerce component of EasyCatalog (eSellerate) could not be installed.

The most common cause of this issue is insufficient user privileges. On Windows machines, right click on the InDesign application icon and select `Run as Administrator`. Once registered, InDesign can be started without Administrator privileges.

</details>

<details>

<summary>Your license has now expired</summary>

Some serial numbers are only valid for a specific period of time, and the serial number you’re attempting to activate has now expired. Please [contact us](https://nousmedis.com/en/get-in-touch-with-us/) for further information on how to renew your license.

</details>

<details>

<summary>The serial number entered is not valid for this version of EasyCatalog</summary>

When purchasing a license for EasyCatalog and its modules, it is valid for a specific version of InDesign (for example, InDesign 2021).  New licenses receive twelve months complimentary software maintenance, during which time upgrades to newer versions of InDesign are free of charge.  Upgrade purchases receive six months complimentary maintenance. If you are inside of this maintenance window, or have separately purchased software maintenance from us, please [contact us](https://nousmedis.com/en/get-in-touch-with-us/) with your serial number(s) and we’ll investigate further.

</details>

<details>

<summary>The activation server couldn’t be reached</summary>

When attempting to reach our activation server, it appears that EasyCatalog received a web page instead of its expected response.  Typically, this is caused by a proxy server or firewall returning a ‘Page not authorized’ web page and preventing EasyCatalog from activating.  Please ensure that you are connected to the internet and InDesign is able to connect to 65bit.co.uk on SSL port 443. If you are unable to allow this access, please close the error dialog and you will be offered the opportunity to activate offline using our web site.  Further information on offline activation can be found [here](#activating-easycatalog-without-an-internet-connection).

</details>

<details>

<summary>An error occurred while communicating with the activation server</summary>

EasyCatalog was unable to verify your serial number by contacting our activation server. Please ensure that there is not firewall or proxy server that is preventing access to 65bit.co.uk on SSL port 443.  If you are unable to allow this access, please close the error dialog and you will be offered the opportunity to activate offline using our web site.  Further information on offline activation can be found [here](#activating-easycatalog-without-an-internet-connection).

</details>

<details>

<summary>The Offline Activation file is too old</summary>

For security reasons, the offline activation file you generate is only valid for a short period of time.  If you receive this message, please activate again using the [Offline Activation dialog](#activating-easycatalog-without-an-internet-connection).

</details>

<details>

<summary>The serial number format is invalid, or is for a product that is not installed</summary>

EasyCatalog could not recognize the serial number as belonging to either EasyCatalog or any of the optional modules you have installed. Please re-check the serial number you have entered to ensure that you are entering it correctly.  If you are, ensure that the module you’re attempting to activate is shown on the “About EasyCatalog” dialog.  If not, please [download](https://nousmedis.com/en/easycatalog/easycatalog-download-and-support/) and re-run the installer, ensuring you select all of the modules you have purchased during the installation process.

</details>


# Transferring an activation

EasyCatalog can only be activated on one computer, but you can easily transfer the license to another

To transfer an activation for all registered modules, press the `Deactivate` button on the `About EasyCatalog` dialog.

<figure><img src="/files/PWg7vsG8Yk8svOfi7SNR" alt="Acerca de EasyCatalog"><figcaption><p>Highlight one serial number and click <strong>Deactivate</strong></p></figcaption></figure>

To transfer an activation for an individual module, highlight the serial number that you would like to transfer in the list of active modules and press the `Deactivate` button.

After a few seconds your serial number will deactivate and you should be able to activate the serial number on another machine in around 5 - 10 minutes.

If you have any problems with activation, please contact us using the [contact form](https://nousmedis.com/en/get-in-touch-with-us/) on our website.


# Opening EasyCatalog documents on other computers

Documents created with EasyCatalog can be opened and edited in a copy of InDesign that does not have the EasyCatalog plug-ins loaded

However, any changes made to the content of the document may cause problems if the document is subsequently re-opened in EasyCatalog.

{% hint style="danger" %}
**Failure to follow these guidelines may result in broken links in your document. If you have any questions please** [**contact us**](https://nousmedis.com/en/get-in-touch-with-us/) **before you open your document on another computer.**
{% endhint %}

If you have users that need to edit the content of EasyCatalog-created documents that must later be updated again using EasyCatalog, either:

1. Download and install the demo version of EasyCatalog on the editing computer. This will ensure that all EasyCatalog links and data are preserved.
2. Download and install the **EasyCatalog Reader** plug-in on the editing computer. This plug-in is available free of charge and will ensure that all links are visible in the document and remain intact. Please, [contact us](https://nousmedis.com/en/get-in-touch-with-us/) to receive a copy of this plug-in.


# Importing your data

The first stage in the process, importing your data is the most critical and key area when using EasyCatalog

By directly importing your data into InDesign, you eliminate re-keying errors and significantly reduce the amount of time required to produce your publication.

{% hint style="danger" %}
The quality of your source data has a direct impact on the quality of the results that can be achieved using EasyCatalog.
{% endhint %}

Once your data has been imported, it is shown in a spreadsheet-style panel that sits alongside your other InDesign panels. Multiple EasyCatalog panels can be open at any time, allowing you to work on publications that use data from multiple sources.


# Supported data sources

EasyCatalog uses Data Providers —other InDesign plug-ins written to interface with EasyCatalog— to import your data.

Your data is stored in a **Data Source**. Some examples of Data Sources are CSV (comma separated) files, a Google Docs Spreadsheet or a MySQL database.

**Data Providers** are provided as separate modules that must be installed alongside EasyCatalog. All of the Data Provider plug-ins are available for installation during the EasyCatalog installation process.

Each of the available **Data Providers** are shown on the `File>New>EasyCatalog Panel` menu. This menu is split into two sections: the top half allows you to import data from a new data source; the bottom allows you to create a new panel from an existing [data snapshot](#user-content-fn-1)[^1].

The configuration required to import your data depends on the type of data you are importing:

<details>

<summary>Delimited Files</summary>

Delimited files include comma and tab delimited files. These types of files can typically be exported from most databases and applications such as Microsoft Excel. Further information on importing delimited files can be found [here](/setting-up-your-data/2.-importing-your-data/delimited-files).

</details>

<details>

<summary>Excel Spreadsheets</summary>

EasyCatalog can directly import Microsoft Excel files (either .xls or .xlsx files). Only the textual content of the file is imported; any formatting is ignored. Further information on importing Excel spreadsheets can be found [here](/setting-up-your-data/2.-importing-your-data/excel-spreadsheets).

</details>

<details>

<summary>Google Docs Spreadsheets</summary>

If your data is stored in the cloud in a Google Docs Spreadsheet, EasyCatalog can connect directly to it and import your data in the same way as importing a local Excel file. Further information on imported data from a Google Docs Spreadsheet can be found [here](/setting-up-your-data/2.-importing-your-data/google-docs-spreadsheets).

</details>

<details>

<summary>Data from an ODBC-compliant Database</summary>

The optional ODBC Data Provider module enables EasyCatalog to connect directly to an ODBC database such as [MySQL](https://www.mysql.com), [Microsoft SQL Server](https://www.microsoft.com/en-gb/sql-server), [FileMaker](https://www.claris.com/filemaker/) or [Access](https://www.microsoft.com/en/microsoft-365/access). An appropriate ODBC driver is required. On Windows, these are typically provided by the database vendor; on Macintosh, you may need to purchase a driver from a third-party vendor such as [Actual Technologies](https://actualtech.com) or [OpenLink Software](https://uda.openlinksw.com). Further information on importing from an ODBC database can be found in [here](/setting-up-your-data/2.-importing-your-data/data-from-an-odbc-compliant-database).

</details>

<details>

<summary>XML</summary>

Using the optional XML Data Provider module EasyCatalog can import an XML structure either from a local file or by connecting to a URL endpoint. The location of each record and field within the XML structure is defined using XPath. Further information on importing from an XML file can be found in [here](/setting-up-your-data/2.-importing-your-data/xml).

</details>

<details>

<summary>Enterprise data providers</summary>

Support for the following data types is provided by the optional **Enterprise Data Provider** module. Further information on configuring the Enterprise Data Provider module can be found [here](/setting-up-your-data/2.-importing-your-data/enterprise-data-provider).

</details>

[^1]: EasyCatalog stores a local file in your Workspace folder, containing an snapshot of your data, and updates it each time you syncronize the data panel with the data source.


# Data concepts

Regardless of the source of your data, there are a number of concepts that are common to all data that is imported into EasyCatalog

## Fields

A field is a singular piece of information, such as a person’s name, job title or zip code. Analogous with a cell in an Excel spreadsheet.

<table><thead><tr><th width="149">Code</th><th width="190">Brand</th><th width="274">Model</th><th>Price</th></tr></thead><tbody><tr><td>11SS</td><td>Sony</td><td>ST-SE370S</td><td>75.89</td></tr><tr><td>11T2</td><td>Sony</td><td>ST-SA3ESB</td><td>68.99</td></tr><tr><td>11T4</td><td>Sony</td><td>ST-SA3ESN</td><td>75.99</td></tr></tbody></table>

Each cell represents a Field.

## Records

A record is a collection of related fields which, when combined, describe something or someone. For example, a `customer` record would contain `name`, `address`, and `telephone` fields. Combined, these fields describe a single customer.

## Rows and Columns

When arranged in a grid, or spreadsheet-style view, each record is represented by a row in the table; each field is a cell.&#x20;

<table><thead><tr><th width="149">Code</th><th width="190">Brand</th><th width="274">Model</th><th>Price</th></tr></thead><tbody><tr><td><mark style="color:red;">11SS</mark></td><td><mark style="color:red;">Sony</mark></td><td><mark style="color:red;">ST-SE370S</mark></td><td><mark style="color:red;">75.89</mark></td></tr><tr><td>11T2</td><td>Sony</td><td>ST-SA3ESB</td><td>68.99</td></tr><tr><td>11T4</td><td>Sony</td><td>ST-SA3ESN</td><td>75.99</td></tr></tbody></table>

Therefore, a column is a collection of fields and all fields in the column contain the same type of information (i.e. all fields in the `address` column will contain address information).

<table><thead><tr><th width="149">Code</th><th width="190">Brand</th><th width="274">Model</th><th>Price</th></tr></thead><tbody><tr><td>11SS</td><td>Sony</td><td><mark style="color:red;">ST-SE370S</mark></td><td>75.89</td></tr><tr><td>11T2</td><td>Sony</td><td><mark style="color:red;">ST-SA3ESB</mark></td><td>68.99</td></tr><tr><td>11T4</td><td>Sony</td><td><mark style="color:red;">ST-SA3ESN</mark></td><td>75.99</td></tr></tbody></table>

## Field Types

Each field that is imported into EasyCatalog has a `type` that determines both how it appears in the document and how it is treated when it is sorted, grouped, etc. Field types are defined on a column-by-column basis, so all fields in the same column will share the same type information.

Field types typically fall in to one of two categories, each with further refinements:

#### Alphanumeric fields

Can contain both text and numeric information, and will be sorted alphabetically on a character-by-character basis.

<table><thead><tr><th width="149">Code</th><th width="190">Brand</th><th width="274">Model</th><th>Price</th></tr></thead><tbody><tr><td><mark style="color:red;">11SS</mark></td><td><mark style="color:red;">Sony</mark></td><td><mark style="color:red;">ST-SE370S</mark></td><td>75.89</td></tr><tr><td><mark style="color:red;">11T2</mark></td><td><mark style="color:red;">Sony</mark></td><td><mark style="color:red;">ST-SA3ESB</mark></td><td>68.99</td></tr><tr><td><mark style="color:red;">11T4</mark></td><td><mark style="color:red;">Sony</mark></td><td><mark style="color:red;">ST-SA3ESN</mark></td><td>75.99</td></tr></tbody></table>

#### Numeric fields

Can only contain numeric information, although additional formatting can be applied to show currency symbols, thousands and decimal separators, etc. Numeric fields are sorted based on their numeric content.

<table><thead><tr><th width="149">Code</th><th width="190">Brand</th><th width="274">Model</th><th>Price</th></tr></thead><tbody><tr><td>11SS</td><td>Sony</td><td>ST-SE370S</td><td><mark style="color:red;">75.89</mark></td></tr><tr><td>11T2</td><td>Sony</td><td>ST-SA3ESB</td><td><mark style="color:red;">68.99</mark></td></tr><tr><td>11T4</td><td>Sony</td><td>ST-SA3ESN</td><td><mark style="color:red;">75.99</mark></td></tr></tbody></table>

## Key Fields

To keep track of each record in your data source, EasyCatalog needs a way to uniquely identify each record. To do this, we use a `key field`.

{% hint style="danger" %}
The choice of key field is critical to the operation of EasyCatalog. The `key field` is used to uniquely identify each record from the data source and **must never change**.
{% endhint %}

The content of the `key field` must uniquely identify each record and must never change for the life of the record. Typically key field candidates can be a stock code, SKU, etc.

<table><thead><tr><th width="149">Code</th><th width="190">Brand</th><th width="274">Model</th><th>Price</th></tr></thead><tbody><tr><td><mark style="color:red;">11SS</mark></td><td>Sony</td><td>ST-SE370S</td><td>75.89</td></tr><tr><td><mark style="color:red;">11T2</mark></td><td>Sony</td><td>ST-SA3ESB</td><td>68.99</td></tr><tr><td><mark style="color:red;">11T4</mark></td><td>Sony</td><td>ST-SA3ESN</td><td>75.99</td></tr></tbody></table>

If the `key field` value for a record changes, EasyCatalog will determine that a record has been deleted (with the old key field value) and a new one created (with the new key field value). Fields placed in a document linked to the old key field value will be shown as [*in error*](#user-content-fn-1)[^1].

More than one field can be selected as the `key field`. In this case, the combination of all of the chosen fields is used to determine the uniqueness of each record. As with a single key field selection, the content of all key fields must remain constant for the life of the record.

{% hint style="info" %}
Choosing multiple fields can sometimes be necessary if the same record appears more than once in the data. In this case, it is necessary to identify an instance of each record using a combination of fields.
{% endhint %}

[^1]: The data panel shows a red square for each record that contains an error.


# Delimited files

Importing data from a CSV/delimited text file

The process begins by selecting `New File Data Source` from the `File→New→New EasyCatalog Panel` menu option.

EasyCatalog will now examine the file to determine the best settings for importing your data. For the majority of users, the settings determined by EasyCatalog will suffice.

{% code title="Example CSV file" lineNumbers="true" %}

```
"Code","Brand","Model","Name","Price"
"11SS","Sony","ST-SE370S","ST-SE370S Silver","76.90"
"11T2","Sony","ST-SAESN","ST-SAESN Red","278.48"
```

{% endcode %}

Let's analyze at the above example CSV file:

* The first line contains the names of each of the columns, so the `First Record Contains Field Names` check-box should be set.
* The `Field Delimiter` is the character used to separate each field in the file; in this example, a comma.
* The `Record Delimiter` is the character used to separate each record (text line) in the file; in this example, a carriage return.

<img src="/files/Q75jZERD82uEkbiwXc8U" alt="File Data Source configuration dialog box" class="gitbook-drawing">

### <img src="/files/JfMSPz7I8MWdozIVlqSE" alt="1" data-size="line">Name

The name wich will be used to identify this data source.

### <img src="/files/v9UiEdE9tIqxJ26pOqAt" alt="2" data-size="line">Location

Shows the path to the selected file, and allows a new file to be chosen. Use the `Reveal` button to go to the file in Windows Explorer (Windows) or the Finder (Macintosh).

### <img src="/files/vZUxkkqCYWQJlpwigGxd" alt="3" data-size="line">Content

The menus in this area allow you to specify how the file is structured. When importing a file for the first time, EasyCatalog will attempt to automatically determine the correct settings for each of these pop-ups by inspecting a sample of the file.

| Setting                                 | Description                                                                                                                                                                                                                                                                                                                                                                                                                                               |
| --------------------------------------- | --------------------------------------------------------------------------------------------------------------------------------------------------------------------------------------------------------------------------------------------------------------------------------------------------------------------------------------------------------------------------------------------------------------------------------------------------------- |
| File Encoding                           | <p>Specify the type of file being used —either ASCII or Unicode.</p><p>EasyCatalog provides full support for importing unicode files and can import UTF-8 and UTF-16 encoded Unicode files.</p>                                                                                                                                                                                                                                                           |
| Field Delimiter                         | Specify the character that’s used to separate each field in the file.                                                                                                                                                                                                                                                                                                                                                                                     |
| Record Delimiter                        | Specify the character that’s used to separate each record in the file.                                                                                                                                                                                                                                                                                                                                                                                    |
| First record contains field names       | <p>Typically, most data files contain the names of the columns in the first row/ record.</p><p>If your data file does not contain this information, un-check this box. Default field names will be assigned to each column when the data isimported. It is strongly recommended that field names are included in your data file to ensure the links to fields in the document are not broken if extra columns are added to your data at a later date.</p> |
| Automatically Detect Type of New Fields | When this option is set, EasyCatalog will attempt to determine the type (whether the field is alphanumeric, numeric, etc) of each field. Turn this option off to default all fields to alphanumeric.                                                                                                                                                                                                                                                      |

### <img src="/files/CX8asFuJ5vP4bHV0yT4n" alt="4" data-size="line">Sample

Each time any of the `Content` settings are changed, the `Sample` pane will change to show how the file will be imported using the current configuration. If you are unsure of the settings to specify, you can experiment until the desired results are shown in the `Sample` pane.

The `Sample` pane is also used to allow columns to be selected to specify column data type/content information. Select a column in the table to activate the settings in the `Field Information` pane. Note that clicking anywhere in the column will highlight the entire column.

### <img src="/files/PSFIXCE5PqeuKmKN39tv" alt="5" data-size="line">Field information

Select a column in the Sample pane to enable the `Field Information` options:

* **Key**. Before importing your data, you need to define a `key` column. The content of this column determines the uniqueness of each records being imported, and the choice of key field is critical to the successful operation of EasyCatalog. EasyCatalog will attempt to automatically determine which of the columns could be used as a key by looking for columns containing unique values. However, it is critical that you confirm that the correct column has been chosen before working with your data source. To define a key field, select the column in the `Sample` panel and check the `Key` checkbox. For further information, see [key fields](/setting-up-your-data/2.-importing-your-data/data-concepts#key-fields).
* **Formatting fields**. Wherever possible EasyCatalog attempts to set the type of each field by looking at the content of each column. The field type can be adjusted using the `Options...` button.

Once you are happy with the configuration options, press the `OK` button to import the file. If the configuration is correct, a new EasyCatalog panel will open showing a spreadsheet-style view of your data.

{% hint style="info" %}
Further information on working with the EasyCatalog data panels can be found in the **Panels** chapter.
{% endhint %}


# Excel Spreadsheets

Importing the data stored in an Excel Spreadsheet

The process begins by selecting `New Excel Data Source` from the `File→New→New EasyCatalog Panel` menu option.

Select your data file using the standard InDesign file selection dialog.

<img src="/files/pmqRAUnZb1eOK2YoXcJ0" alt="Excel Data Source dialog box" class="gitbook-drawing">

### <img src="/files/JfMSPz7I8MWdozIVlqSE" alt="1" data-size="line">Name

The name wich will be used to identify this data source.&#x20;

### <img src="/files/v9UiEdE9tIqxJ26pOqAt" alt="2" data-size="line">Location

Shows the path to the selected file, and allows a new file to be chosen. Use the `Reveal` button to go to the file in Windows Explorer (Windows) or the Finder (Macintosh).

### <img src="/files/vZUxkkqCYWQJlpwigGxd" alt="3" data-size="line">Content

Choose which sheet to import from the Excel workbook using the `Sheet` pop-up. Alternatively, select `All sheets` to import data from all sheets in the workbook. EasyCatalog will create a unique list of field names from across all sheets and create a `Sheet Name` field for each record that will be populated with the name of the sheet that the record belongs to.

The `Range` popup shows the data ranges defined in the Excel worksheet and allows a portion of the records and fields in the sheet to be imported.

`Ignore Rows With One Cell of Data` will ignore any rows in the spreadsheet where only a single cell is populated. This setting is generally used for spreadsheets where headers have been inserted amongst the data in Excel.

### <img src="/files/CX8asFuJ5vP4bHV0yT4n" alt="4" data-size="line">Sample

The sample pane shows a preview of the data as it will be imported by EasyCatalog. When a column is selected in this area the Field Information pane will be available.

### <img src="/files/PSFIXCE5PqeuKmKN39tv" alt="5" data-size="line">Field information

Before importing your data, you need to define a `key` column. The content of this column determines the uniqueness of each records being imported, and the choice of key field is critical to the successful operation of EasyCatalog. For further information, see [Key Fields](/setting-up-your-data/2.-importing-your-data/data-concepts#key-fields).

To define a key field, select the column in the `Sample` panel and check the `Key` checkbox.

#### Formatting fields

Wherever possible EasyCatalog attempts to set the type of each field based on the format of the cells in Excel.

For example, fields that are numeric in Excel will also be numeric in EasyCatalog. To change the format of a column, select it in the `Sample` pane and use the `Options...` button to display the `Field Options` dialog. Further information on formatting data using the `Field Options` dialog can be found here.

Once you are happy with the configuration options, press the `OK` button to import the file. If the configuration is correct, a new EasyCatalog panel will open showing a spreadsheet-style view of your data.

{% hint style="info" %}
Further information on working with the EasyCatalog data panels can be found in the **Panels** chapter.
{% endhint %}


# Google Docs Spreadsheets

Using a Google Docs Spreadsheet allows you to import data from an online shared data source

The process begins by selecting `New Google Docs Spreadsheet Data Source` from the `File→New→New EasyCatalog Panel` menu option.

To connect to your [Google Docs](https://docs.google.com/) account, you must first authorize EasyCatalog to access it by pressing the `Authenticate` button. This needs to be done for each Google Doc Spreadsheet data source you configure. As authentication is required for each new data source, it is possible to import data from multiple Google Docs accounts.
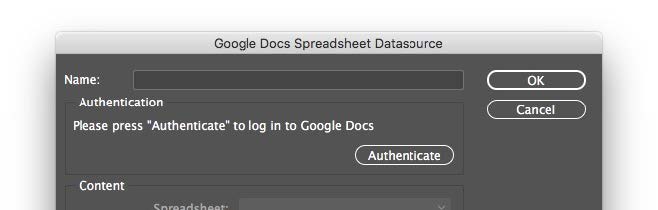
<figure><img src="/files/PkSuNgYznxyApTmtIqaj" alt="Authenticate with Google Docs"><figcaption><p>Authenticate with your Google Docs account</p></figcaption></figure>

Authentication is done via a web browser, using the standard Google Docs authentication mechanism. On the web page that appears you will be shown the information EasyCatalog is attempting to access. If at any time you need to prevent EasyCatalog from accessing your Google Docs account, you can remove EasyCatalog from [My Account→Security→Third-party apps with account access](https://support.google.com/accounts/answer/3466521?hl=en) in Google Docs.

After pressing the `Authenticate` button, EasyCatalog will wait for a response from Google. During this time, a `Waiting for Authorization` dialog will appear: do not cancel this dialog until you have logged in via the browser window, or unless you want to canel the log-in. You should be switched back in to InDesign once you’ve completed the authorization process in your browser.

<img src="/files/xISG2mIShq1ELoH1O8xx" alt="Google Docs Spreadsheet Datasource dialog box" class="gitbook-drawing">

### <img src="/files/JfMSPz7I8MWdozIVlqSE" alt="1" data-size="line">Name

The name wich will be used to identify this data source.&#x20;

### <img src="/files/v9UiEdE9tIqxJ26pOqAt" alt="2" data-size="line">Authentication

Once authenticated, your Google Docs user name will be shown here. Occasionally it is necessary to re-authenticate: the can happen, for example, if you remove EasyCatalog’s access to your Google Docs from your Google account.

### <img src="/files/vZUxkkqCYWQJlpwigGxd" alt="3" data-size="line">Content

Select the name of the spreadsheet you would like to import using the `Spreadsheet` pop-up. You can then choose to import an individual sheet from inside of the spreadsheet using the `Sheet` pop-up. Alternatively you can select `All Sheets` to import data from all sheets within the spreadsheet. A `Sheet Name` field will also be created and populated with the name of the sheet that the record belongs to.

The `Range` popup shows the data ranges defined in the spreadsheet using the `Data→Named Ranges` menu option in Google Docs. Only data defined by the selected range will be imported into your new data source.

### <img src="/files/CX8asFuJ5vP4bHV0yT4n" alt="4" data-size="line">Sample

The sample pane shows a preview of the data as it will be imported by EasyCatalog. When a column is selected in this area the `Field Information` pane will be available.

### <img src="/files/PSFIXCE5PqeuKmKN39tv" alt="5" data-size="line">Field information

Before importing your data, you need to define a `key` column. The content of this column determines the uniqueness of each records being imported, and the choice of key field is critical to the successful operation of EasyCatalog. For further information, see [Key Fields](/setting-up-your-data/2.-importing-your-data/data-concepts#key-fields).

To define a key field, select the column in the `Sample` panel and check the `Key` checkbox.

#### Formatting fields

The field type for all fields imported from Google Sheets is set to `Alphanumeric`. To change the format of a column, select it in the `Sample` pane and use the `Options...` button to display the `Field Options` dialog.

Once you are happy with the configuration options, press the `OK` button to import the file. If the configuration is correct, a new EasyCatalog panel will open showing a spreadsheet-style view of your data.

{% hint style="info" %}
Further information on working with the EasyCatalog data panels can be found in the **Panels** chapter.
{% endhint %}


# Data from an ODBC-compliant Database

You will need to purchase a license of the ODBC Data Provider module in order to connect to an ODBC-compliant database

Using drivers supplied by your database vendor, or a third-party driver manufacturer, the ODBC Data Provider can connect directly to hundreds of SQL database systems including [MySQL](https://www.mysql.com), [Microsoft SQL Server](https://www.microsoft.com/en/sql-server/), [MariaDB](https://mariadb.org) and [FileMaker](https://www.claris.com/filemaker/).

## Benefits

Connecting directly to a database improves both the speed at which you can start working with your data and allows you to target specific data you wish to work with. The power of your database can also be utilised to selectively retrieve, filter, sort and even perform calculations on your data which is imported directly into EasyCatalog without the need to generate export text files.

The `ODBC Data Provider` is also bidirectional, so any changes made to data on the document can be optionally updated on the database.

## Installation

The ODBC Data Provider is an optional module for EasyCatalog, and should be installed using the supplied installer.

{% hint style="info" %}
Macintosh users: If the ODBC Data Provider module is not available after installation, please follow the instructions in the ‘platform Specific Issues’.
{% endhint %}


# Connecting to the database

The ODBC Data Provider enables EasyCatalog to directly connect to your database

EasyCatalog `ODBC Data Provider` needs a suitable [ODBC driver](#user-content-fn-1)[^1] installed. Creating and working with an ODBC Data Source works in the same way as working from a flat-file, although requires slightly more configuration.

Before a data source can be configured in EasyCatalog, you must first use either:

<table><thead><tr><th width="131">Platform</th><th>Application</th></tr></thead><tbody><tr><td>Macintosh</td><td>The <a href="http://www.odbcmanager.net">ODBC Manager</a> application, which is usually located in the <code>applications>Utilities</code> folder.</td></tr><tr><td>Windows</td><td>The <code>ODBC Data Sources</code> control panel. On Windows 11, use the search tool and type ODBC to open the <code>ODBC Data Sources Administrator tool</code>.</td></tr></tbody></table>

Using either of these, a new `Data Source` must be configured. This Data Source contains information on how to connect to your database, the type of database being used, etc.

{% hint style="danger" %}
This configuration should be performed prior to configuring your new data source in EasyCatalog.
{% endhint %}

## Configuring an ODBC Data Source

Setting up EasyCatalog to use an ODBC Data Source is a straight forward process as long as the data source has been configured correctly in the ODBC Manager/ODBC Data Sources application.

To create a new ODBC Data Source in EasyCatalog navigate to `New > EasyCatalog Panel > New ODBC Data Source`. This will open the dialog shown in the screenshot below.

<img src="/files/N7CX8yssB7lyjIQ3nmSN" alt="ODBC Data Source configuration dialog box" class="gitbook-drawing">

### <img src="/files/JfMSPz7I8MWdozIVlqSE" alt="1" data-size="line">Name

The name of the data source –this will be used to refer to the data source by EasyCatalog. The data source needs a unique name, which will be used to identify it later by EasyCatalog. The data source will be added to your workspace folder within EasyCatalog and subsequently available from the  `File→New→EasyCatalog panel` menu.

### <img src="/files/v9UiEdE9tIqxJ26pOqAt" alt="2" data-size="line">Datasources

A list of the ODBC Data Sources configured in the ODBC Manager application (Macintosh) or ODBC Datasources Administrator Tool (Windows) is shown here. Select the data source you are connecting to to pre-fill the Connection String.

### <img src="/files/vZUxkkqCYWQJlpwigGxd" alt="3" data-size="line">Connection string

In order for EasyCatalog to connect, a username and password must be specified. This is done by adding `UID=USER;PWD=PASS;` to the connection string. Alter `USER`/`PASS` with the details appropriate to the host.

The Connection String is a series of parameters that contain information on how to connect to your database. The format of the connection string is based on the ODBC Connection String standard, and consists of a series of keyword/value pairs separated by semicolons. The equal sign (=) connects each keyword and its value.

In it’s simplest form a connection string needs only to specify a data source name, which is configured separately in the ODBC Control panel (on Windows) or the ODBC Manager application (on Macintosh).

A list of the typical connection string keywords and values is shown below. Note that whether they are supported depends on the ODBC driver you are using. The options specified by the connection string override any settings made in the Data Source configuration in the ODBC Control panel (Windows) or ODBC Manager (Macintosh).

<table><thead><tr><th width="145">Keyword</th><th>Value</th></tr></thead><tbody><tr><td><strong>DSN</strong></td><td>Data source name</td></tr><tr><td><strong>HOST</strong></td><td>Server host name</td></tr><tr><td><strong>SVT</strong></td><td>Database server type</td></tr><tr><td><strong>DATABASE</strong></td><td>The name of the database to connect to</td></tr><tr><td><strong>OPTIONS</strong></td><td>Database-specific options</td></tr><tr><td><strong>UID</strong></td><td>User Name</td></tr><tr><td><strong>PWD</strong></td><td>Password</td></tr><tr><td><strong>READONLY</strong></td><td>N/Y/I</td></tr><tr><td><strong>FBS</strong></td><td>Fetch-buffer size</td></tr><tr><td><strong>STMT</strong></td><td>Specify a statement that will be executed after the connection to the database.</td></tr></tbody></table>

Example:

```sql
DSN=BackupServer;UID=jdoe;PWD=letmein;
```

### <img src="/files/CX8asFuJ5vP4bHV0yT4n" alt="4" data-size="line">Tables

Click this button to see a full list of tables available in your database. This dialog can also be used to build the SQL statement.

### <img src="/files/PSFIXCE5PqeuKmKN39tv" alt="5" data-size="line">Statement

The statement needs to be modified to select from the correct table (if unsure of which table to use, the available tables are shown by selecting the `Tables…` button), in this case the table is called `Productos`. The encoding should be set to the same encoding as the ODBC driver. Press `Execute` to execute the query, if the query has been successful it will show fields and some data in the `Sample` area.

The statement is used to specify the exact data to retrieve from the database, and takes the form of a standard SQL-compliant request.

[Structured Query Language](https://en.wikipedia.org/wiki/SQL) allows you to specify exactly what to retrieve from the database. By using SQL, your database can be interrogated in an almost infinite number of ways.

The exact syntax and use of SQL is beyond the scope of this guide, and there are many SQL tutorials available. This guide assumes that you have a working knowledge of your database and are able to retrieve your data using SQL.

### <img src="/files/oNHnICjmz9Seq5oeT00Y" alt="6" data-size="line">Encoding

Change this pop-up if you are using a Unicode-compliant database. Depending on the ODBC driver being used, select either `Unicode` or `Utf-8`.

{% hint style="warning" %}
**Macintosh only**: For non-Unicode databases, select `windows latin 1` if the text in the database was originated from a Windows machine.
{% endhint %}

### <img src="/files/UZaKFNJJZwUWWeDI1uRV" alt="7" data-size="line">Execute

Click the `Execute` button to test the Connection String and SQL statement settings. The results returned by the query will be shown in the sample window.

### <img src="/files/k6Zl13FZeNCCrs8mSCgk" alt="8" data-size="line">Sample

The results of the database query will be shown here. Use this area to ensure the results are as expected, and to configure `Field Options`.

### <img src="/files/QgxLcfOcXOQ7eTJPR8DQ" alt="9" data-size="line">Field information

Select one of the columns returned by the query in the `Sample` pane and click the `Options` button to configure its `Field Options`.

Once successfully configured and tested, at least one field must be configured as the [key field](/setting-up-your-data/2.-importing-your-data/data-concepts#key-fields) — a field which can be used to uniquely identify each record from the database.

[^1]: You need to download and install an ODBC driver for MySQL, MS SQL Server, etc. in order to stablish a proper connection to the database.


# Updating the database

Because EasyCatalog understands when the content of individual fields needs to be updated, the ODBC Data Provider supports updating of the database at a field level.

Each field has an associated SQL statement which is used to update new content to the database. This functionality is optional, and is configured using EasyCatalog’s field Options dialog.

## Field options dialog

SQL statements must be configured for each field that will be updated on the database. Keywords can be included in the statement which are replaced with field content, key field value, etc.

Only fields with the `Update Using statement` check-box set will be updated to the database, regardless of whether the update statement has been entered.
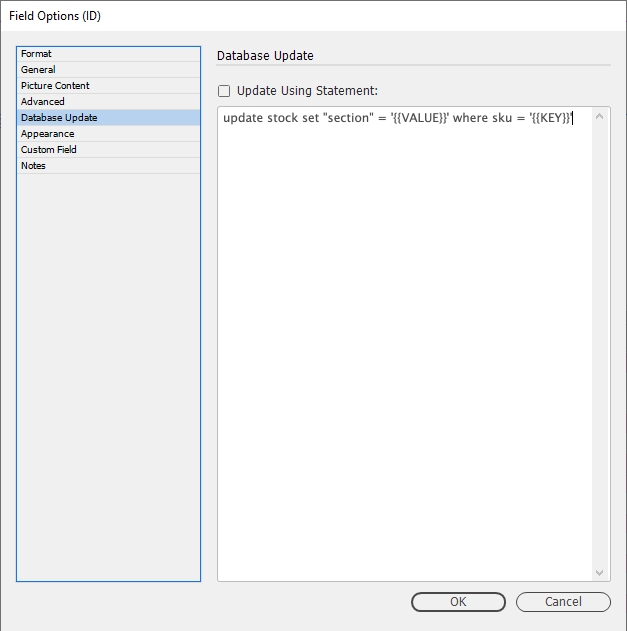
<figure><img src="/files/iXrufRLxiZplv2OjgpzK" alt=""><figcaption><p>Database update Field Options</p></figcaption></figure>

## Update using statement

The ODBC Data Provider substitutes keywords contained in the statement immediately prior to execution to construct an SQL statement. These keywords are:

<table><thead><tr><th width="183">Keyword</th><th>Value</th></tr></thead><tbody><tr><td><code>{{VALUE}}</code></td><td>Replaced with the current value of the field</td></tr><tr><td><code>{{KEY}}</code></td><td>Replaced with the unique key for the record</td></tr><tr><td><code>{{FIELDNAME}}</code></td><td>The content of other fields for this record can be referenced by including the field name in <strong>upper case</strong>. e.g. <code>{{PART_NO}}</code></td></tr></tbody></table>

### The Use of Quotes within the statement

When building your ‘update’ statements, it is important to ensure that quotes are used to enclose alphanumeric data.

Typically, around table and column names double quotes (") should be used. Field content should be enclosed in single quotes ('):

```sql
update "Stock" set "myfield" = '{{VALUE}}' where "key" = '{{KEY}}'
```

In the above SQL statement, `Stock`, `myfield` and `key` are table and column names; `VALUE` and `KEY` are field content. The usage shown here is typical, and depends on the type of database being connected to.

## Updating the database

The database will be updated with the contents of the panel, so first use the `Update panel` menu option to update the panel with the latest information from the document.

To update the database with the latest data, use the `Update Data Source...` menu option from the EasyCatalog data panel.

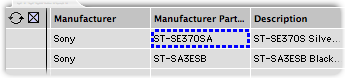
Only data that has changed in the panel will be updated to the database. A blue dotted outline shows the data that needs updating to the database.
<figure><img src="/files/VX5VG0Hz2REQVYBWUxPI" alt="Field content updated"><figcaption><p>A blue dotted outline shows the data that needs updating to the database.</p></figcaption></figure>


# XML

XML (Extensible Markup Language) is a W3C initiative that allows information to be encoded in a structure that computers and humans can understand

The XML Data Provider is an optional module for EasyCatalog which enables EasyCatalog to link to an XML-formatted file. As with all EasyCatalog Data Providers, this link is bi-directional allowing changes made to the data within InDesign to be updated to the source XML file.

The XML Data Provider enables EasyCatalog to directly connect to your XML files. Creating and working with an XML data sources works in the same way as working from delimited files, although slightly more configuration is required.

The Data Provider makes heavy use of XPath to interrogate the XML file. XPath expressions are used to identify the location of each record and field within the XML.

The XML Data Provider also provides support for a wide range of character encodings including unicode (UTF-8 and UTF-16).

## What is XPath

XPath is a language for finding information in an XML document, and is used by the XML Data Provider to navigate through elements and attributes in your XML document

XPath uses path expressions to select nodes or node-sets in an XML document. These path expressions look very much like the expressions you see when you work with a traditional computer file system.

In addition to being able to find and identify nodes, XPath also includes a number of functions, such as node value comparison, etc. The remainder of this manual assumes a working knowledge of XPath. For further information, please refer to the full language reference, which can be found on the following Web page: <http://www.w3.org/TR/xpath>

## Configuring an XML data source

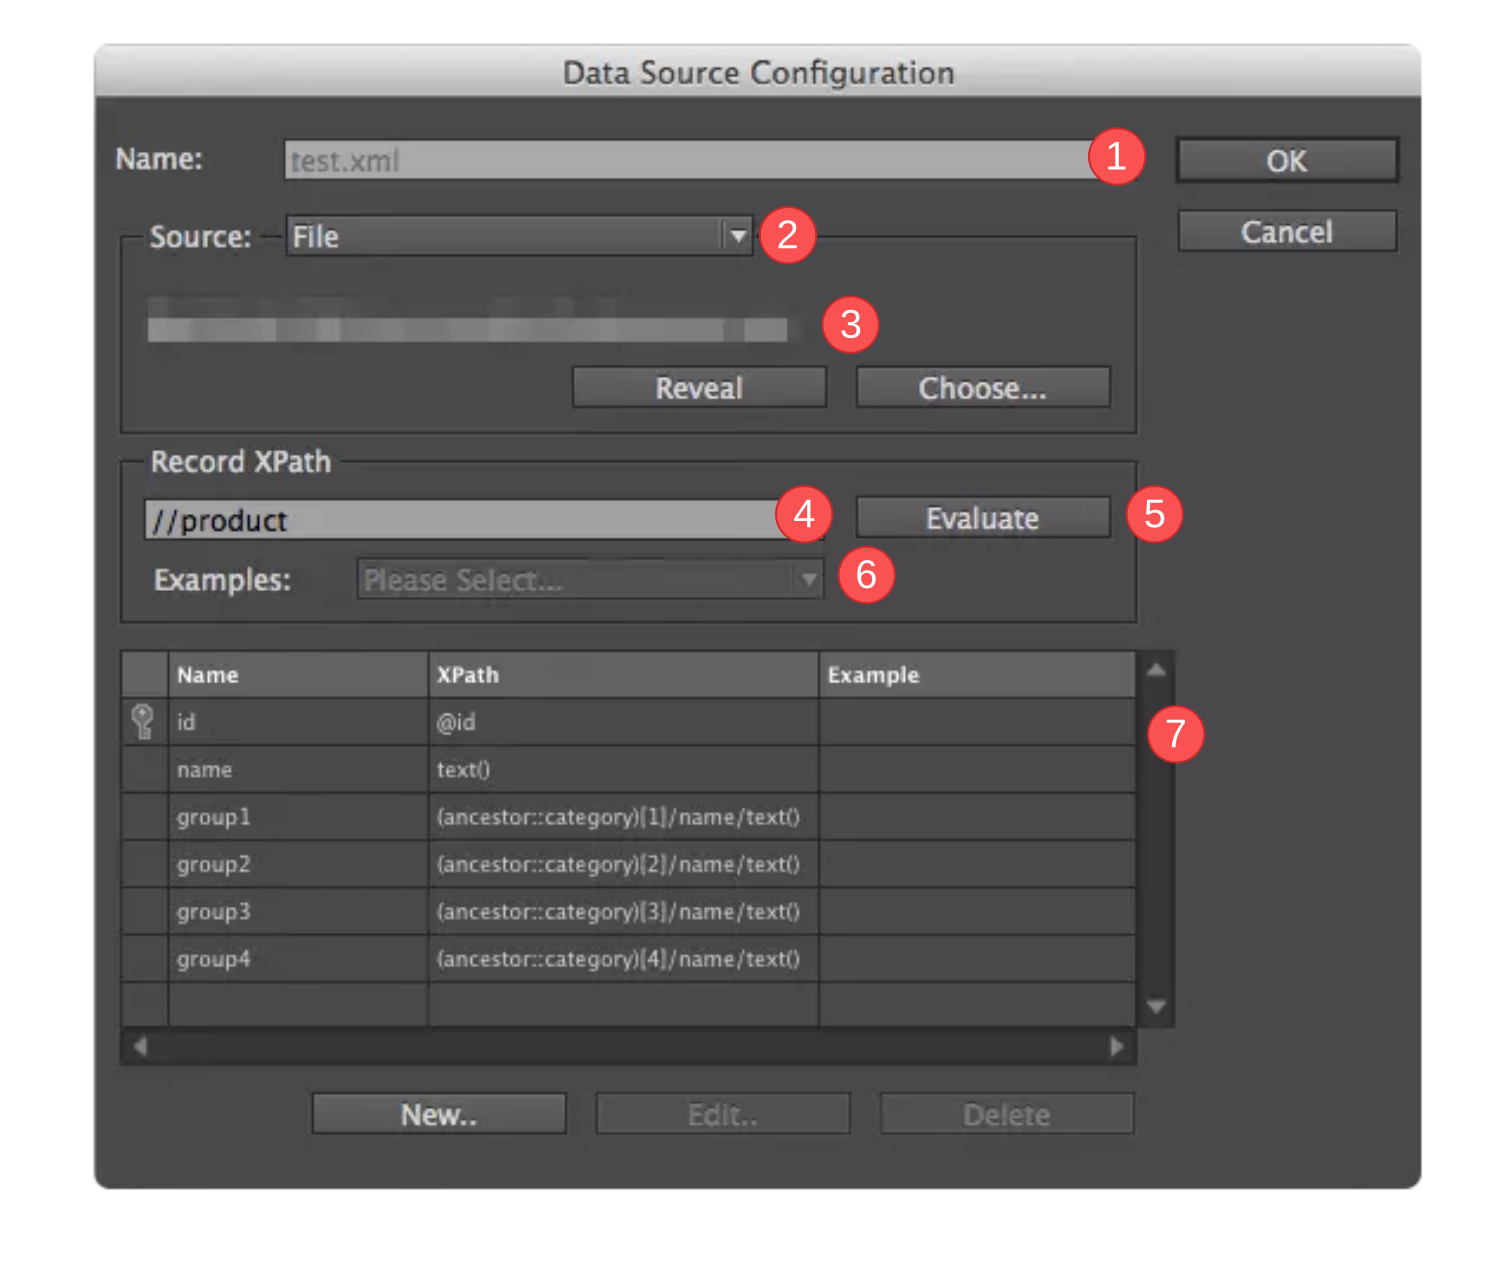
Configuring a data source is a relatively simple task and principally involves specifying various values within the `XML Data Source Configuration` dialog box.

<img src="/files/ursaPUHZeesSQkrXkpxI" alt="XML Data Source Configuration dialog box" class="gitbook-drawing">

### <img src="/files/JfMSPz7I8MWdozIVlqSE" alt="1" data-size="line">Data Source Name

As with all EasyCatalog data sources, the data source name must be unique and is used to identify your new data source. The name entered here will appear on the File→New→easyCatalog Panel menu.

### <img src="/files/v9UiEdE9tIqxJ26pOqAt" alt="2" data-size="line">File

The location of the XML file is shown here, and this file will be read when you create the data source and on subsequent ‘Synchronize with Data Source’ operations.

### <img src="/files/vZUxkkqCYWQJlpwigGxd" alt="3" data-size="line">File path

Displays the path to the currently selected XML file.

### <img src="/files/CX8asFuJ5vP4bHV0yT4n" alt="4" data-size="line">Record XPath

The XML Data Provider requires an XPath to identify the location of each record node within the XML. A pop-up menu, which has been populated based on the content of the XML file, is provided containing a list of valid XPaths. To use one of the example shown in the list, select it from the `Examples` pop-up menu.

### <img src="/files/PSFIXCE5PqeuKmKN39tv" alt="5" data-size="line">Evaluate

Evaluates the ‘Record XPath’ expression and displays the number of records found in the XML file. To determine whether you have the correct record XPath, use the `Evaluate` button: this will show you how many records will be imported into EasyCatalog.

### <img src="/files/oNHnICjmz9Seq5oeT00Y" alt="6" data-size="line">Examples

Displays a list of example XPath expressions. These are built from the parsed XML file.

### <img src="/files/UZaKFNJJZwUWWeDI1uRV" alt="7" data-size="line">Field XPaths

This area of the dialog shows the fields that have been configured. An XPath must be provided for each of the fields you want to import from the record node. Create a new field using the ‘New’ button at the bottom of the dialog:

<figure><img src="/files/IiWpSmKyNFtLq7zAaRHm" alt=""><figcaption><p>XPath field configuration</p></figcaption></figure>

The `Name` of the field source will be the name of the field within EasyCatalog.

Enter the XPath to the field’s content in the `Path` field. This path is relative to the record XPath configured earlier.

Use the `Examples` pop-up menu to display an example list of XPath expression paths.

Use the `Key` check-box to define the key field for the Data Source.

{% hint style="warning" %}
The choice of key field is critical to the operation of EasyCatalog. The key field is used to uniquely identify each record from the data source and must never change.
{% endhint %}

EasyCatalog has the ability to load fragments of source XML into a field. This is specified using the `Load as XML Fragment` check box as shown on the `Field Configuration` dialog box. When this is checked the entire XML structure at the specified location is loaded into a field. This can be used by the complex table population feature or interrogated using custom field commands.

## Example XML configuration

Use the following simple XML as an example:

{% code lineNumbers="true" %}

```xml
<?xml version="1.0" encoding="UTF-8"?>
<section name = "Digital Camera Accessories">
    <category name="Kodak">
        <product stockcode="320-387-1010">
            <fields>
                <description>DC260/265/290 Lens adaptor</description>
                <price>787.00</price>
            </fields>
        </product>
        <product stockcode="320-387-1020">
            <fields>
                <description>Sanp Server 1200 1</description>
                <price>28.50</price>
            </fields>
        </product>
    </category>
    <category name="Canon">
        <product stockcode="320-387-1030">
            <fields>
                <description>30 BJC-70/80 battery</description>
                <price>787.00</price>
            </fields>
        </product>
        <product stockcode="320-387-1040">
            <fields>
                <description>BJ30 AC Adpator</description>
                <price>28.50</price>
            </fields>
        </product>
    </category>
</section>
```

{% endcode %}

The data in the above example for each record is contained within a product node. The record XPath for this node would be:

```xml
/section/category/product
```

Using the `Evaluate` button will report four instances of these nodes within the XML. This indicates that when the data source is fully configured, EasyCatalog will find four records from this XML structure.

Now that the record XPath has been configured, XPaths for each of the fields we want to import into EasyCatalog must be defined. In the example shown here, we want to import five fields - some of them are contained within the record node, others such as `Category name` and `Section name`  must be retrieved from the record’s parent nodes.

XPaths for fields are relative to the record. So, for example, to retrieve the contents of the `Price` node, we would use the following XPath:

```xml
/fields/price/text()
```

To retrieve the contents of a parent node, such as the product’s category name , use `..` to reference nodes and attributes higher up in the XML hierarchy:

```xml
../@name
```

This specifies the `name` attribute of the record’s parent node.

To retrieve the contents of the other nodes and attributes, the following XPaths would be used:

<table><thead><tr><th width="144.33333333333331">Field</th><th width="221">XPath</th><th>Description</th></tr></thead><tbody><tr><td>Stock Code</td><td>@stockcode</td><td>Contents attribute of the <code>stockcode</code></td></tr><tr><td>Category</td><td>../@name</td><td><code>name</code> attribute of the parent node</td></tr><tr><td>Section</td><td>../../@name</td><td><code>name</code> attribute <code>section</code> node of grandparent</td></tr><tr><td>Description</td><td>/fields/desciption/text()</td><td>Textual contents of the given node</td></tr><tr><td>Price</td><td>/fields/price/text()</td><td>Textual contents of the given node</td></tr></tbody></table>

## Updating the Data source

In the same way file based data sources are updated, EasyCatalog has the ability to update XML data sources. A snapshot of the XML file is stored when a data source is created or synchronized, so EasyCatalog will only update those nodes that have changed. This means any additional information in the XML which is not used by EasyCatalog will be preserved.

## Reconfiguring the Data Source

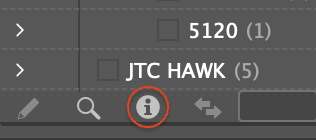
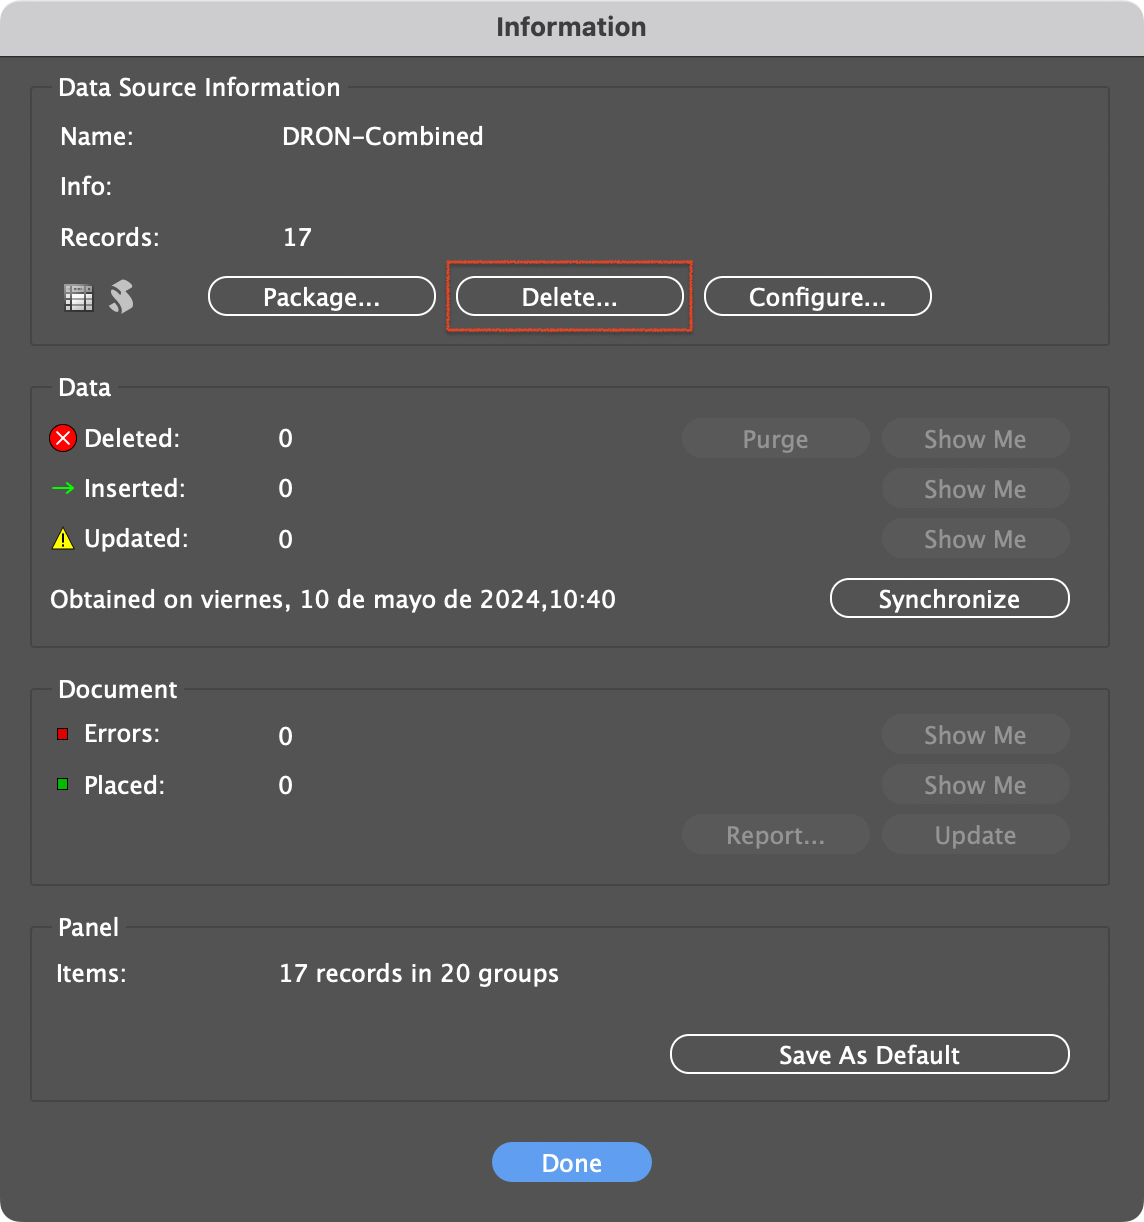
The configuration for a XML Data Source can be modified later using the `Information` dialog box. Click the `Info` button at the bottom of the EasyCatalog panel, then use the `Configure...` button to change the settings for the data source.

#### Key fields

Once a data source has been configured, only the XPath attribute for `key` fields can be amended. Key fields cannot be renamed or deleted after the initial configuration. This prevents links on your document from being broken by modifying the key fields.


# Enterprise data providers


# Managing Enterprise Data Providers

We are constantly adding more and more data providers. If you can't find yours, please contact us and we will develop one custom data provider for you

## Installing, updatind and deleting data providers

Select `File> New > EasyCatalog Panel > Manage Enterprise Data Providers`. The Manage Enterprise Data Providers dialog box will open:

<img src="/files/HzPFpyUOk67YCzbtoHvA" alt="Manage Enterprise Data Providers dialog box" class="gitbook-drawing">

<img src="/files/JfMSPz7I8MWdozIVlqSE" alt="1" data-size="line">**Install** / **Update**. Select an installed Data provider that shows an exclamation sign and clic this button to install the most recent version of the data provider. To install a new one, select one data provider from the `Available` list and click the `Install` button.&#x20;

<img src="/files/v9UiEdE9tIqxJ26pOqAt" alt="2" data-size="line">**Uninstall**. If you no longer want to use one data provider, select it from the list of `Installed` data providers and clic this button to uninstall it. EasyCatalog will delete the data provider associated files from the EasyCatalog Workspace folder.

<img src="/files/vZUxkkqCYWQJlpwigGxd" alt="3" data-size="line">**Import**. This button allows you to import custom made data providers. For more information on developing custom data providers, please [contact us](https://nousmedis.com/contact).

<img src="/files/CX8asFuJ5vP4bHV0yT4n" alt="4" data-size="line">**Reveal**. Clic this button to open the folder containing the selected data provider script.

<img src="/files/PSFIXCE5PqeuKmKN39tv" alt="5" data-size="line">**Installed data providers**. This list shows the currently installed data providers. EasyCatalog displays the version number and, when a new version is available, an exclamation mark. Click the `(i)` icon to display in your default browser a page with the new features and bug fixes.

<img src="/files/oNHnICjmz9Seq5oeT00Y" alt="6" data-size="line">**Available data providers**. EasyCatalog adds more and more data providers. Select your data provider from this list and click the `install` button to download the associated script files to your Workspace folder. Installed data providers will be available in the `File > New > EasyCatalog Panel` menu option. If there is more than one version for one data provider, clic the arrow icon to the left of the data provider name to display all available versions.

## Custom data providers

If you want to import data from your database, ERP or PIM and it is still not supported by EasyCatalog, we can develop a custom data provider for your data source. Please, contac us at:

{% embed url="<https://nousmedis.com/contact>" %}

# Akeneo

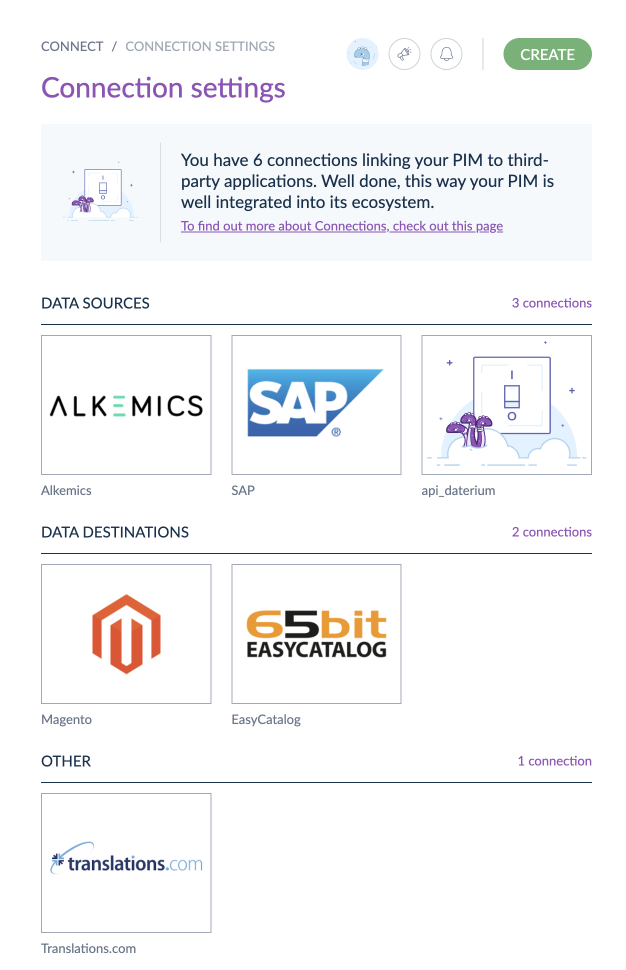
In Akeneo PIM, there is a concept that helps you connect any third party you might think of to boost the powers of your PIM. It is called Connections.

For your PIM to work correctly, you first need to connect it to the data flows that are coming from your ERP, DAM, or even MDM. Once your products are enriched into the PIM, you need them to be delivered to all your channels, such as syndication, e-commerce, or publishing platforms, like EasyCatalog.

## Configuring Akeneo

In order to export data to EasyCatalog, first you need to create a `connection` of type `Data destination`.

### 1. Create a connection <a href="#how-to-export-your-assets-with-the-export-jobs" id="how-to-export-your-assets-with-the-export-jobs"></a>

Here are the simple steps to create a connection:

1. Click on `Connect`.
2. Then on `Connection settings`.
3. Click on `Create`.
4. In the Label field, enter the name of your connector. For example, write `EasyCatalog` or `EasyCatalog connector` if you wish to connect your PIM to EasyCatalog.\
   ***Sidenote**: the code of the connection is automatically generated based on the label.* *You can keep it as is or change it. It's up to you!*
5. Choose the [flow type](https://help.akeneo.com/v7-connect-your-pim/v7-monitor-your-data-flows) of your connection.

<figure><img src="/files/Xhk2FAcpbW6p2lp7Fx4Q" alt="Connection settings"><figcaption><p>Connection Settings</p></figcaption></figure>

Once your connection is created, you'll be able to assign it a picture in order to easily see which connection it refers to. For example, if your connection represents your connection to EasyCatalog, you may want to put a picture of the EasyCatalog logo, exactly like in the screenshot below.

<figure><img src="/files/TaNVEypfOZQFUVSw6GV0" alt="EasyCatalog channel imagen"><figcaption><p>EasyCatalog connection image</p></figcaption></figure>

After creating the connection, you'll also be given a set of credentials to authenticate your connector.

### 2. Choose your flow type

When creating or updating a connection, you must define a [flow type](#user-content-fn-1)[^1]. It will determine the way your connection flows are monitored in the `data flows dashboard`.

This flow type has three available options you'll have to choose from. To create an EasyCatalog connection, you need to choose a **destination connection** flow type.

{% hint style="info" %}
If you choose this option, the Data flows dashboard will focus on the data pushed outside Akeneo via this connection.
{% endhint %}

### 3. Grab your credentials <a href="#grab-your-credentials" id="grab-your-credentials"></a>

Whenever you create a connection, Akeneo automatically generates a set of credentials for you. These credentials are necessary if you want to make any API calls to the PIM or, in our case, use the `Akeneo Enterprise Data Source` in EasyCatalog.

These credentials consist of 4 different strings:

* the `client id`,
* the `secret`,
* the connection `username`,
* the connection `password`.

To access the client id, the secret and the username, go to `Connect > Connection settings` and click on the connection you want to see the credentials. They are displayed on the right side of the screen in the `Credentials` column.

{% hint style="warning" %}
The password is only shown once to you after the connection creation. So, make sure you save it somewhere.
{% endhint %}

### 4. Set the connection permissions

For each connection, you can define a set of permissions that can restrict access to:

* some API endpoints. In this case, those permissions are defined thanks to your `connection user role`.
* some parts of your product catalog. In this case, those permissions are enforced thanks to the `connection user group`. Note that they are only available in the **Enterprise Edition**.

## Configuring the EasyCatalog Akeneo Data Source

EasyCatalog Enterprise module provides two Akeneo Data Sources: Akeneo and Akeneo extended. Both offer the same functionality but the extended version adds two additional filter options: by product **Status** and by product data **Completeness**.

### Install the Akeneo Data Source provider

Select `File> New > EasyCatalog Panel > Manage Enterprise Data Providers`. The [Manage Enterprise Data Providers](/setting-up-your-data/2.-importing-your-data/enterprise-data-provider/managing-enterprise-data-providers) dialog box will open. Select the `Akeneo` or `Akeneo Extended` data provider from the list and click the `Install` button.

{% hint style="info" %}
The `Akeneo Extended` data provider offers two additional options: `Status` —allows you to filter imported products by its status, All, enabled or disabled— and `Complete` —you can import all productos or only the ones marked as completed by Akeneo.
{% endhint %}

### Create a new Akeneo Data Source

Configuring a data source is a relatively simple task and principally involves specifying various values within the `Akeneo Data Source Configuration` dialog box:

<figure><img src="/files/gVS5nOkMZttjtgjVDlzo" alt="Akeneo Data Source dialog box"><figcaption><p>New Akeneo Data Source dialog box</p></figcaption></figure>

#### <img src="/files/JfMSPz7I8MWdozIVlqSE" alt="1" data-size="line"> Name

As with all EasyCatalog data sources, the data source name must be unique and is used to identify your new data source. The name entered here will appear on the `File→New→EasyCatalog Panel` menu.

#### <img src="/files/v9UiEdE9tIqxJ26pOqAt" alt="2" data-size="line"> Server URL

Enter the URL of the Akeneo server. EasyCatalog will connect to it when you create the data source and on subsequent `Synchronize with Data Source` operations.

#### <img src="/files/vZUxkkqCYWQJlpwigGxd" alt="3" data-size="line"> Client ID, Secret, User and Password

Enter the credentials Akeneo created for your when [configuring the connection](#grab-your-credentials).

#### <img src="/files/CX8asFuJ5vP4bHV0yT4n" alt="4" data-size="line"> **Create Attribute Label Columns**

Check this option if you want to import the field label name for each attribute. This allows you, for example, to use the label name in your catalog and automatically translate it into another language if you decide to import another language from Akeneo.

#### <img src="/files/PSFIXCE5PqeuKmKN39tv" alt="5" data-size="line"> Include products in subcategories

Check this option to import all the products for the main categories and also the ones for each subcategory.&#x20;

#### <img src="/files/oNHnICjmz9Seq5oeT00Y" alt="6" data-size="line"> Duplicate product per category

If a product belongs to more than one category and you want to display it in your catalog once per category, check this option. EasyCatalog will modify the Akeneo product id by concatenating[^2] the `product id` and the `category id` fields.

#### <img src="/files/UZaKFNJJZwUWWeDI1uRV" alt="7" data-size="line"> Include entities

Check this option to import the [Akeneo reference entities](https://api.akeneo.com/concepts/reference-entities.html) into yor data source.

#### <img src="/files/k6Zl13FZeNCCrs8mSCgk" alt="8" data-size="line"> Initialize

Click the `Initialize` button to test your Akeneo server connection using the provided credentials and initialize the Akeneo data provider. If the connection is succesful, the `Default locale`, `Channel`, `Category` and `Locale` will be editable and populated with your Akeneo values.&#x20;

#### <img src="/files/QgxLcfOcXOQ7eTJPR8DQ" alt="9" data-size="line"> Default locale

The `Default locale` is used to obtain the correct set of categories and channels. If `All` is selected, then the code will be displayed in the `Category` and `Channel` menu.

#### <img src="/files/6rWS2Rox3J95QjFQZvzv" alt="10" data-size="line"> Channel

Select a [channel](#how-to-export-your-assets-with-the-export-jobs) name to import the products for a specific channel. Usually you will define one different channel for each output: digital, print, ecommerce, web, etc.&#x20;

#### <img src="/files/OAObOxE4Q46uMyU2KHpp" alt="11" data-size="line">Category

Select a category name if you only want to retrieve the products for that category; select `All` to import all the products for all the categories.

#### <img src="/files/UvfaTgg7Soxo2L3WVze1" alt="12" data-size="line">Locale

Select `All` if you want to import each field multiple times, once per language. EasyCatalog will concatenate the two letter [Country Code Language](https://www.fincher.org/Utilities/CountryLanguageList.shtml) to the field name. For example, the `description` field will be imported twice if your Akeneo PIM has two locales, one for Spain's Spanish (`description_es_ES`) and another for USA English (`description_en_US`).

## Group you products by category

Use the EasyCatalog Data panel `Group...` menu option to group your products by category.This will greatly improve the usability of your data and will allow further pagination options.

<figure><img src="/files/reyd4QgUAXkhausLki5b" alt="Akeneo data panel"><figcaption><p>Akeneo data panel grouped by category</p></figcaption></figure>

[^1]: The flow type is a central concept in the connection notion. It allows you to characterize the data flows that will interact with your PIM. More precisely, it allows indicating the **direction** of a given flow.

[^2]: Joining or combining two or more words or strings.


# Sales Layer

Sales Layer provides a specific connector that allows EasyCatalog to import data straight from the PIM, and keep it always up to date with a simple click of the mouse.

The Sales Layer PIM stores and manages your data using three different entities[^1]:

* Categories
* Products
* Variants

{% hint style="warning" %}
In addition to these three entities, it is possible to create custom entities, which allow you to store data that is not strictly associated with a specific product or variant (for example, a list of certificates, an author's agenda, etc.).

The EasyCatalog Sales Layer module **cannot import** these entities by default, so it will be necessary to have a custom development or configure an additional Excel or CSV channel in Sales Layer.

[Contact us](https://nousmedis.com/get-in-touch-with-us-2/) so we can help you configure your Sales Layer instance.
{% endhint %}

## 1. Sales Layer configuration

To export your product, category, and variant information to EasyCatalog, you must first create an output channel of the EasyCatalog type.

### 1.1. Create an EasyCatalog output channel

Go to the `Channels` section and click on the `Channel's marketplace` tab. Now locate the `EasyCatalog for Adobe InDesign` channel and click on the `Create` button.

<figure><img src="/files/9l7OwTqhfneMMdLBXRcM" alt="Select the EasyCatalog for Adobe InDesign channel in the Sales Layer&#x27;s Channel&#x27;s marketplace"><figcaption><p>Select the EasyCatalog for Adobe InDesign channel in the Sales Layer's Channel's marketplace</p></figcaption></figure>

### 1.2. General parameters

When you click on the `Create` button (from the previous step), Sales Layer will display the channel configuration wizard:

<figure><img src="/files/vReaBAV7eq4IiGI8oYJX" alt="EasyCatalog channel configuration, Parameters tab"><figcaption><p>EasyCatalog channel configuration, Parameters tab</p></figcaption></figure>

<mark style="color:red;">➊</mark> Sales Layer will first display the `Connector ID`. You must copy and write down this code because you will need it when specifying the connector ID in the EasyCatalog Sales Layer connector configuration dialog box.

<mark style="color:red;">➋</mark> Add a descriptive `Name` for your channel. This will help you distinguish it from other channels when you set up more than one EasyCatalog channel in your PIM.

<mark style="color:red;">➌</mark> Under the channel name, Sales Layer will display the text you add in the `Description` field.

<mark style="color:red;">➍</mark> In order to establish a secure connection between Sales Layer and EasyCatalog, you will need to assign a `private key`. Sales Layer will generate a private key if you haven't created one yet. Please also write down this data, as it is necessary for configuring the Sales Layer data source in EasyCatalog.

<mark style="color:red;">➎</mark> If your Sales Layer instance manages product information in more than one language, select here the languages you want to export to EasyCatalog.

{% hint style="info" %}
When your Sales Layer instance has more than one language, all fields configured as multi-language will be exported using the following pattern: `field name_language code`. For example, a field called `Features` and configured as multi-language will be exported as many times as there are languages you have selected in this option. If you have selected `Spanish` and `English`, it will be exported as `Features_es` and `Features_en`.
{% endhint %}

<mark style="color:red;">➏</mark> `Exporting items with status` will allow you to determine whether to export `all products`, only those marked as `visible`, `visible and drafts`, or `visible and invisible`.

{% hint style="danger" %}
One of the most common mistakes when configuring the EasyCatalog channel is selecting the `Only visible` option. Remember that, by default, Sales Layer marks a newly created or imported product as `Draft`. With the `Only visible` option selected, EasyCatalog will only receive products with `Visible` status, and you will no longer receive your most recent products, because their default status will be the `Draft` status.
{% endhint %}

The option `Include empty categories` will send to EasyCatalog all the information for each category, even if it does not have any products assigned to it. Leave this value set to `No` to prevent your EasyCatalog panel from receiving more data than necessary.

### 1.3. Output data

Click the `Continue` button to access the `Output Data` tab.

<figure><img src="/files/Ri8vuErYG80i7uBsMDAy" alt="Sales Layer EasyCatalog connector output data tab"><figcaption><p>Sales Layer EasyCatalog connector output data tab</p></figcaption></figure>

<mark style="color:red;">➊</mark> In the first section, you must select each of the entities to be exported. Remember that EasyCatalog only natively supports the following entities: `Categories`, `Products`, and `Variants`. If you can't see one of the entities you want to export, click the `+ Add Table` button and select it from the drop-down list.

{% hint style="success" %}
Please [contact us](https://nousmedis.com/get-in-touch-with-us-2/) if you want to set up an import connector that imports data straight from your custom entities.
{% endhint %}

<mark style="color:red;">➋</mark> The `Activate` option allows you to include the current selected entity in the output data (`Yes`) or exclude it (`No`).

<mark style="color:red;">➌</mark> Enter the name you want to give the entity in the output channel.

{% hint style="danger" %}
Do not change the default value proposed by Sales Layer, or EasyCatalog will not be able to recognize the table.
{% endhint %}

<mark style="color:red;">➍</mark> If you only want to export part of your product catalog, select a category from this drop-down list. Leave the value blank to export all products from all categories.

{% hint style="info" %}
In Sales Layer, a product can belong to more than one category. When this happens, Sales Layer will export the product as many times as it has categories assigned. In this case, it is very important to select the `ID` field as the key field when configuring the panel in EasyCatalog; otherwise, EasyCatalog will return an error for duplicate records and will not be able to complete the import correctly.
{% endhint %}

<mark style="color:red;">➎</mark> If you want to filter the data that the channel will export, you can enter a search string: Sales Layer will only export the items that meet the search criteria.

<mark style="color:red;">➏</mark> By default, the EasyCatalog channel will display all fields of the selected entity. Each line represents a field. You can change the order of the fields by dragging them up or down.

1. A padlock icon means that the field cannot be deleted nor modified (it is necessary for the correct import from EasyCatalog).
2. The `Type` option determines how the data will be exported: `Normal` (string or numbers), `Image` (will export the download URL of the image file) or `Template` (allows you to define other custom output formats, such as JSON or XML).
3. The `Name in EasyCatalog` column allows you to change the name of the field that EasyCatalog will receive. This option cannot be modified in locked fields.
4. The `Related field` column allows you to choose which field to export in that row. If the field does not exist in your PIM and you want, for example, to export a constant value, select the empty field option and then use the `+ Formula` button to enter a value or formula.

<mark style="color:red;">➐</mark> Sales Layer features a powerful formula editor that allows you to manipulate the content and format of each field during the output.

<figure><img src="/files/pKBK0wflCNBfvdU8qMf8" alt="Sales Layer formula editor"><figcaption><p>Sales Layer formula editor</p></figcaption></figure>

<mark style="color:red;">➑</mark> Image fields allow you to export one or more versions (formats) of your images. To create a high-quality catalog, always choose the `Original (ORG)` version of an image.

Repeat the same steps to configure each of the entities (`Products` and, optionally, `Variants`).

## 2. Configuring a Sales Layer Data Source in EasyCatalog

This is the easiest step. To begin, select `File > New > EasyCatalog Panel > New Sales Layer Data Source`. The following dialog box will open:

<figure><img src="/files/F1WfT3ZPWKTkt60iokZN" alt="Sales Layer Data Source Configuration dialog box"><figcaption><p>Sales Layer Data Source Configuration dialog box</p></figcaption></figure>

Configure the different options in the dialog box by following these instructions:

1. Start by assigning a name to your data source. This will be the name used by the data panel that will be created when you click the `OK` button.
2. Paste the `Connector code` and the `Private key` that you created in the previous step, during the configuration of the EasyCatalog connector in Sales Layer.
3. In the `Version` field, leave the default value provided, 1.18. To use the old Sales Layer API, enter 1.17.
4. If your Sales Layer configuration uses the `Variants` entity, check this box to be able to import them.
5. Click the `Apply` button so that EasyCatalog connects to Sales Layer and validate that the credentials and options you have selected are working as expected. If everything is correct, EasyCatalog will display a preview of the fields you configured in the Sales Layer output channel.
6. If a product belongs to more than one category in your Sales Layer instance, or if you have decided to import variants, use the `ID` field as the `key field`. Otherwise, EasyCatalog will return an error for duplicate records. By default, the `ID` field is already marked as the key field.
7. Click the `OK` button to finish. EasyCatalog will display a new data panel with the name you provided in the first step.

[^1]: A Sales Layer entity would be the equivalent of a table in a relational database.


# Plytix

Work in progress...


# Custom data providers

Creating an Enterprise Data Provider Script For JSON data

JSON (JavaScript Object Notation) is a lightweight data interchange format that is easy for humans to read and write, and easy for machines to parse and generate. It is widely used for transmitting data between a server and a web application, as well as between various software components. JSON represents structured data using a collection of key-value pairs, arrays, and nested objects, making it highly flexible and versatile.

Despite its simplicity, JSON does not inherently organize data into records and field sets like you might find in a relational database. Instead, JSON structures data in a hierarchical manner, which can be deeply nested. This makes it an excellent choice for applications that require a flexible schema or need to handle complex data structures.

To leverage JSON data within EasyCatalog, you can transform it into a structure that EasyCatalog can import. This is typically done through a script that breaks down each JSON object into individual records and represents the keys within each object as fields. This transformation allows EasyCatalog to handle the JSON data effectively, treating each object as a separate record with fields corresponding to the JSON keys.

It’s important to note that this transformation process depends on the specific structure of your JSON data and the requirements of your application. You may need to customize the script to handle various data types, nested objects, and arrays to ensure a seamless integration with EasyCatalog.

In summary, JSON is a crucial format for structured data exchange due to its readability, flexibility, and ease of use. By converting JSON data into a format compatible with EasyCatalog, you can harness its power for a wide range of applications, from web development to data processing and beyond.

Here’s a simple script designed to handle a simply structured JSON File *(Uses functions only available in the 2024 or later version of EasyCatalog).*

{% code lineNumbers="true" %}

```lua
---------------------------------------------------------------------------------------------------------
-- JSON 2024 Custom Data Provider.
--
-- Only works in the 2024 version of EasyCatalog
--
-- Key functions are called during data retrieval and update. The script is initialised and called on demand, 
-- as such it is statless and relies on the 'configration' settings passed form call to call to represent
-- the data sources current settings.
--
-- Data Source Creation
-- During creation of a new data source the call sequence is as follows:
-- 1. Initialize() - returns a table of default settings, which are [ersisted in the data sources datasource.xml file.
-- 2. ConfigureUI(config) presents configuration settings to the user to allows modification (not called on InDesign Server)
-- 3. Synchronize(datasource, config) - called after configuration to retreive a complete RECORDSET
--
-- Data Source Updates
-- SaveRecords(config, datasource, records) - is called when the user selects "Update Data Source". 
-- this is responisble for passing updates back and clearing the update flag.
--
---------------------------------------------------------------------------------------------------------
--
--  Oct 2023    Created         v1.0.0
--
---------------------------------------------------------------------------------------------------------

--[[
Example structure of JSON this sample is designed to load:
{
  "products": [
    {
      "id": "12345",
      "name": "Product A",
      "description": "This is Product A, a high-quality product.",
      "price": 19.99,
      "category": "Electronics",
      "stock": 50
    },
    {
      "id": "67890",
      "name": "Product B",
      "description": "Product B is a versatile and popular item.",
      "price": 29.99,
      "category": "Clothing",
      "stock": 100
    },
    {
      "id": "54321",
      "name": "Product C",
      "description": "Product C is a premium accessory.",
      "price": 39.99,
      "category": "Accessories",
      "stock": 25
    }
  ]
}
]];


-- This specifies the JSONPath to each 'record' in the resulting data 
local record_JSONPath = "$.products[*]"

-- This specifies fields to extract from each record 
local fields_with_options = {
    { name = "id", jsonpath = "$.id", key = "true"},
    { name = "name", jsonpath = "$.name"},
    { name = "description", jsonpath = "$.description"},
    { name = "price", jsonpath = "$.price"},
    { name = "stock", jsonpath = "$.stock"}
};

------------------------------------------------------------------------------------------------------------------------
-- load_file
------------------------------------------------------------------------------------------------------------------------
function load_file(path)
  local file = io.open(path, "r");
  if not file then return nil end
  local content = file:read "*a" -- *a or *all reads the whole file
  file:close();
  return content
end

------------------------------------------------------------------------------------------------------------------------
-- getActualScriptVersion
------------------------------------------------------------------------------------------------------------------------
function getActualScriptVersion()
  local info =  GetInfo();
  return 'v' .. info.version;
end


---------------------------------------------------------------------------------------------------------
-- Initialize - Define the data sources default settings. 
-- Returns a table of settings.
---------------------------------------------------------------------------------------------------------
function Initialize()

  config = {}
  config.name = "JSON 2024";
  config.initialized  = false;
  config.JSONfile = '';
  config.version = getActualScriptVersion();            -- future usage, new.15.Dec.2021, started at 'v4.8.6'
  return config;
end


---------------------------------------------------------------------------------------------------------
-- validatemethod 
---------------------------------------------------------------------------------------------------------
function validatemethod(dialog)

  local name = dialog:getwidget("Name").value;
  if name == "" then
    DIALOG.alert("please enter a valid name.");
    return "Name";
  end

  local file = dialog:getwidget("edit_file").value;
  if file == "" then
    DIALOG.alert("please select a JSON file to process.");
    return "edit_file";
  end

  return "";
end

---------------------------------------------------------------------------------------------------------
-- setDialogWidget
---------------------------------------------------------------------------------------------------------
function setDialogWidget(pConfigdialog, pName, pValue)
  local widget = pConfigdialog:getwidget(pName);
  widget.content = pValue;
  pConfigdialog:setwidget(widget);
end

---------------------------------------------------------------------------------------------------------
-- get_JSON_file_location
--
---------------------------------------------------------------------------------------------------------
function get_JSON_file_location()
  -- ask user for JSON file location
  local done, path = DIALOG.choosefile("Choose JSON file");
  return done, path;
end

---------------------------------------------------------------------------------------------------------
-- chooseButtonAction
---------------------------------------------------------------------------------------------------------
chooseButtonAction = function(configdialog) 
  local done, path = get_JSON_file_location();     -- JSON file location
  if (done) then
    actionConfig.JSONfile = path;
    setDialogWidget(configdialog, "edit_file", actionConfig.JSONfile);
  end
end


---------------------------------------------------------------------------------------------------------
-- ConfigureUI
--
---------------------------------------------------------------------------------------------------------
function ConfigureUI(config)
  
  local enable_name = false;

  actionConfig = config;

  if config.initialized == false then   
      enable_name = true;
  end

  local title_new = "New JSON 2024 Data Source";
  local title_edit = "JSON 2024 Data Source";
  local the_title = title_new;

  if enable_name == false then
    the_title = title_edit;
  end
  configdialog = DIALOG.new( { title = the_title, validate = validatemethod } );
  
  local name_top            = 20;
  local file_top            = 20+(25*1);
  local choose_button_top   = 20+(25*2);
  local button_top          = 20+(25*3)+10;
  local widget_left         = 90;            
  local static_right        = widget_left;    
  local widget_right         = 500;            
  local choose_button_width  = 100;
  local choose_button_left   = widget_right - choose_button_width;

  configdialog:addwidget(
  {

      { type = "statictext", title = "Name:", align = "left", left = 20,  top = name_top, right = static_right, height = 20	 	},
      { type = "editbox",  id = "Name", left = widget_left, top = name_top,  right = widget_right,  height = 20,  content = config.name, enable = enable_name	},     
      { type = "statictext", title = "File:", align = "left", left = 20,  top = file_top, right = static_right, height = 20	 	},
      { type = "editbox",  id = "edit_file", left = widget_left, top = file_top,  right = widget_right,  height = 20,  content = config.JSONfile, enable = true	},
      { type = "button", id = "edit_file_choose", title = "Choose", left = choose_button_left,  top = choose_button_top,  width = choose_button_width,  heigth = 20,  onchange = chooseButtonAction},
      { type = "cancelbutton", title = "Cancel", id = "cancel", left = 270, top = button_top, width = 80, heigth = 20,  },
      { type = "okbutton", title = "Ok", id = "ok", left = 270+80+20, top = button_top, width = 80, heigth = 20 },

  }
  );

  if configdialog:open() then
	  config.name       = configdialog:getwidget("Name").content;
	  config.JSONfile   = configdialog:getwidget("edit_file").content;
    return config;
  end
  
end


---------------------------------------------------------------------------------------------------------
-- Synchronize
-- config  : Configuration parameters (in/out).  If changed, will update datasource.xml 
-- datasource : Data source object
-- Returns :  new RECORDSET or nil if canceled
---------------------------------------------------------------------------------------------------------
function Synchronize(config, datasource)
  config.initialized = true;
  return RECORDSET.new(fields_with_options, create_records_from_json(config));
end

---------------------------------------------------------------------------------------------------------
-- SaveRecords
-- Update changes back to the data source 
-- config  : Configuration parameters (in/out)
---------------------------------------------------------------------------------------------------------
function SaveRecords(config, datasource, records) 

  for i=1,records:size() do
    record = records:getrecord(i);
    for x=1, record:size() do
      field = record:field(x);
      if field:getupdatestate() & 2 == 2 then
        field:setupdatestate(0);
      end
    end
  end
end


---------------------------------------------------------------------------------------------------------
-- GetReleaseNotes
--
--  This is called when the ‘info’ button is selected associated with a data provider row on the   
--  Manage Enterprise Data Provider dialog.
---------------------------------------------------------------------------------------------------------
function GetReleaseNotes()

  local body = "";

  body = body .. "<h1>JSON 2024 Release Notes</h1>";

  body = body .. "<h3>v1.0.0</h3>";
  body = body .. "<ul>";
  body = body .. "<li>A sample script using JSONPath to parse JSON data</li>";
  body = body .. "</ul>";

  c = {
    title = "JSON 2024 Release Notes",
    body = body,
  };
  
  return c;
end

---------------------------------------------------------------------------------------------------------
-- GetInfo
---------------------------------------------------------------------------------------------------------
function GetInfo()
  c = {
      url        = "https://www.65bit.com/docs/creating-custom-json-data-providers/",
      name       = "JSON 2024 File Sample",
      version    = "1.0.0",
 };
 return c;
end

---------------------------------------------------------------------------------------------------------
-- Given a URI, return true if the download should be handled by this script 
---------------------------------------------------------------------------------------------------------
function CanResolveAssetURI(field, uri) 
  return false;
end

---------------------------------------------------------------------------------------------------------
-- Turns a URI into a fully qualified location, from which the storage location is determined
---------------------------------------------------------------------------------------------------------
function ResolveAssetURI(config, uri) 
  return uri;
end

---------------------------------------------------------------------------------------------------------
-- Download the asset to the local cache
-- location : result of 'ResolveAssetURI' 
-- filepath : locale cache full path
---------------------------------------------------------------------------------------------------------
function GetAsset(config, location, filepath) 
  return false;
end

---------------------------------------------------------------------------------------------------------
-- Returns a table of records taken from the JSON with the fields as specified in 'fields_with_options' 
-- config : Configuration table with file location 
---------------------------------------------------------------------------------------------------------
function create_records_from_json(config)
    json = load_file(config.JSONfile);
    if json == nil or json == "" then
        error("JSON empty or cannot be loaded");
    end
    records = {}

    -- Use the records JSONPath to create a table of JSON data
    table_of_records, err = jsonarraytotable(json, record_JSONPath);
    if table_of_records == nil then
        error(err);
    end

    for r = 1, #table_of_records do
        record_json = table_of_records[r];
        if record_json ~= "" and record_json ~= nil then 
            r = {}
            for i = 1, #fields_with_options do
                r[fields_with_options[i].name] = processjson('jsonpath', record_json, fields_with_options[i].jsonpath);
            end
            table.insert(records, r);
        end
    end
    return records;
end
```

{% endcode %}


# Common errors and warnings

Below are common import errors and their possible resolutions.

<details>

<summary>A data source of this name already exists in your workspace folder. Do you want to overwrite it?</summary>

You are attempting to open a data source with the name of a data source that already exists. You may continue by answering ‘yes’ to this dialog, but the previous version of the data source will be deleted.

</details>

<details>

<summary>A data source of the same name is already open. Please use another name or close all related panels and try again.</summary>

You are attempting to open a new data source using the name of a data source that already exists. Although similar to the above error message, you cannot continue as panels for the old data source are still open. To overwrite the old data source, close its data panels using the `Close Panel` menu option - you may need to show hidden data panels using the `EasyCatalog Panels` menu on the Window menu.

</details>

<details>

<summary>A duplicate key was detected (value). Please check your data provider configuration and try again.</summary>

EasyCatalog idenitifes each field in the document using a combination of the data source name, field name and key field value. Therefore, each of these elements must be unique in order to indentify every placed field.

In the column(s) you have nominated as the key field(s), you have duplicate values (the value that is duplicated is shown in the error). To overcome this, remove duplicate keys from the source data or check that your key field configuration is correct.

</details>

<details>

<summary>Field names must be unique - ‘(field name)’ appears more than once</summary>

EasyCatalog idenitifes each field in the document using a combination of the data source name, field name and key field value. Therefore, each of these elements must be unique in order to indentify every placed field.

In your configuration you have selected `First record contains field names`, but the first record contains multiple fields with the same name (shown in the error). To remedy this you must change your source data so that it does not include duplicate field names.

</details>

<details>

<summary>Field names must be unique - ‘’ appears more than once</summary>

Where no field name is shown in the above error, this usually indicates that your records contain more fields than there are field names. This error will only occur when `First record contains field names` is selected.

To rectify this problem, ensure that each record in the file contains the same number of fields, and that the number of fields matches the number of field names supplied in the first row/record of the file.

</details>

<details>

<summary>Duplicate records were found and have been removed</summary>

Records that contain exactly the same content cannot be imported, as each would have the same key field values. This error is informative, and the duplicate records will be removed and the file imported. You should check to see whether you need to import these missing records and, if so, include exta information in the source data to differentiate between each record.

</details>

<details>

<summary>Data cannot be loaded because blank field names were found</summary>

All fields imported must have a name, and this error is indicating that one or more have empty names. This error will only occur when `First record contains field names` is selected. Check the source data to ensure that each field has a name, and that the number of fields in each record does not exceed to number of field names specified in the first record/row of the file.

</details>


# Data caching and the workspace folder

EasyCatalog doesn't require a permanent connection to your data –by caching your data in a local  folder, you can continue working with EasyCatalog even when your data source is unavailable

Your `workspace folder` also contains all of the settings for each data source you create, allowing you to close and re-open data sources without having to re-configure them each time.

Caching the data locally also offers other benefits, including highlighting differences in the data when new data is retrieved.

By default, your workspace folder will be configured to be:

* **Macintosh**: Documents:EasyCatalog Workspace
* **Windows**: My Documents/EasyCatalog Workspace

## Specifying a workspace folder

The location of your workspace folder can also be changed - this can be anywhere on your local machine, provided that EasyCatalog always has access to it.

See the `Application Preferences` chapter for further information on how to specify the EasyCatalog workspace folder.

Once you have finished with a data source, it can be deleted using the `Delete` button from the Information dialog. To access the `Information`  dialog, click the `info` button at the bottom of one of the data panels.

<figure><img src="/files/ahEvDfAGBvpuhAtHezgY" alt="" width="158"><figcaption><p>The info button at the bottom of each EasyCatalog data panel</p></figcaption></figure>

<figure><img src="/files/KcapmvomZsz4s9sax3Hi" alt="" width="375"><figcaption><p>The Delete Data Source option in the Information dialog box.</p></figcaption></figure>


# Field options

EasyCatalog provides facilities for fields to be formatted before placement in a document. By setting Field Options you can, for instance, ensure that your price fields are formatted to use the correct currency symbol and number of decimal places.

In addition to text fields, EasyCatalog can also import pictures. Using the `Field Options` dialog, you can specify whether a picture should be scaled, aligned, etc. when imported.


# Opening the field options dialog

The Field Options dialog can be accessed in a number of ways

#### 1. When creating a new data source

Select a column in the `Sample` pane on the Data Source Configuration dialog and press the `Options...` button at the bottom of the dialog.

#### 2. From the `Field Options` menu on the data panel's pop-out menu.

#### 3. By holding the Alt/Option key while double-clicking on the field's column header.

<figure><img src="/files/awz6f5evTTMivIyrusPP" alt="" width="375"><figcaption><p>Double-Click the column header while pressing the Alt/Option key</p></figcaption></figure>


# Available field options

The Field Options dialog is split into a number of sections

## Format

The `Format` pane allows you to define the field type, or how it is formatted when it appears on the page. Fields can be defined as Alphanumeric or Numeric, with additional options such as importing HTML-formatted text available.&#x20;

## General

Options such as 'prefix' and 'suffix' can be found here, in addition to 'cleansing' which can be used to clean-up data before it is formatted.

## Picture content

In addition to importing textual content, EasyCatalog can also import pictures either from a folder or from a URL. Additional options such as how the image should be scaled and aligned can also be found on the Picture Content pane.

## Advanced

Advanced field options generally don't need to be configured as the defaults are generally correct. However, options such as the ability to exclude the field from certain operations (such as `Update Document`) can be found on this pane.

## Database Update

The settings used here are only used when working with a data source that has been created using the ODBC Data Provider or the Sales Layer Data Provider. This pane enabled you to specify an 'update' statement that is used to update your database (when data has been changed in InDesign).

## Appearance

Allows you to set a specific appearance of the field in the `Data` and `Record Viewer` panels, such as a different background color or shape. You can also change the appearance of a field if its contents meet certain conditions.

## Custom field

Custom Fields are fields that only exist within EasyCatalog and are populated using one of our inbuilt functions.

## Notes

You can write any notes or comments about the field, such as why it can be empty, how to detect an error, etc.

## Preprocessing

Allows content to be processed before any additional formatting is applied. Once processed other options such as cleansing, prefix, suffix are applied.


# The format pane

The Format pane allows you to specify the field's type

For example, the field type determines how a field will appear on the page and how its contents will be sorted. The field type can be selected from the pop-up at the top of the Format panel. Depending on your selection, the panel will display a different set of options.


# Alfanumeric

<figure><img src="/files/bUFusYOhAL7FeNa3EnR1" alt="Field options > Alphanumeric"><figcaption><p>Field options > Alphanumeric</p></figcaption></figure>

Fields that are designated as `Alphanumeric` contain both letters and numbers, and will be transferred to the document exactly as they appear in the data source. This option should be utilized when the original source, like a database, already formats the field correctly. In this context, `Alphanumeric` ensures that no additional formatting or modification is applied during the data transfer, preserving the integrity of the original data.

### Strip whitespace

Whitespace characters, including tabs, spaces, and other non-visible characters, will be removed from both the beginning and the end of the field's content. This process, known as "trimming," ensures that no extraneous spaces or tabs remain around the data, which can help prevent formatting issues and improve data consistency.

### Formatted

If your source data includes formatted text, which means text with formatting tags such as `<b>` for bold or `<i>` for italics, make sure to enable the `Formatted` check box. This ensures that the formatting tags are recognized and preserved, maintaining the intended appearance of the text in the output document.

### Normal HTML

When the field content is of the “rich text” type and, therefore, includes advanced HTML tags to define paragraphs (`<p>`), lists (`<li>`), headings (`<h1>`), etc., check this box. EasyCatalog will convert each of these tags into their approximate equivalent in InDesign. For example, the tags `<p>...</p>` will be converted into paragraph breaks, `<ol><li>...</li></ol>` into numbered lists, `<ul><li>...</li></ul>` into bulleted lists, etc.

{% hint style="info" %}
HTML format is applied when the field content is inserted into the document; the original content will continue to be displayed in the data panel of your data source.
{% endhint %}

### Enhanced HTML

The enhanced HTML parser cleanses the field HTML prior to processing. Any unbalanced are corrected and the entire field is enclosed with an implied `<body>` node. As a general rule any tag which matches the name of character or paragraph style will apply that style.

<div data-full-width="false"><figure><img src="/files/XFyj44HIXgtu4mNIBTVM" alt="Enhanced HTML > HTML Options"><figcaption><p>Enhanced HTML > HTML Options</p></figcaption></figure></div>

The following tags and attributes are available:

| Tag       | Attribute        | Value                                                                                                                                             |
| --------- | ---------------- | ------------------------------------------------------------------------------------------------------------------------------------------------- |
| **span**  | style            | Optional.  See section below                                                                                                                      |
| **font**  | face             | Font name                                                                                                                                         |
|           | color            | Swatch name                                                                                                                                       |
| **p**     | shade            | Paragraph shade                                                                                                                                   |
|           | align            | left,right,center,justify                                                                                                                         |
|           | style            | Paragraph style name                                                                                                                              |
| **a**     | href             | URL                                                                                                                                               |
|           | style            | Character stylesheet to apply                                                                                                                     |
| **img**   | src              | Filename or full path to an image                                                                                                                 |
|           | url              | Hyperlink to apply                                                                                                                                |
|           | shape            | <p>Image box frame shape variant:<br>ELLIPSE<br>TRIANGLE<br>POLYGON</p>                                                                           |
|           | swatch           | Swatch name                                                                                                                                       |
|           | clippingpath     | PHOTOSHOP                                                                                                                                         |
|           | fitting          | <p>FRAMETOCONTENT<br>CONTENTAWARE</p>                                                                                                             |
|           | width            | Value in points or string with unit of measure                                                                                                    |
|           | height           | Value in points or string with unit of measure                                                                                                    |
|           | style            | Object style name                                                                                                                                 |
|           | rotation         | Rotation of the image                                                                                                                             |
|           | scriptlabel      | Script Label to apply to image frame                                                                                                              |
|           | barcodetype      | <p>Type of barcode to generate:<br>EAN5<br>EAN8<br>EAN13<br>Code 128<br>UPCA<br>I2OF5<br>Datamatrix<br>Code 39<br>EAN14<br>GS1-128<br>QR Code</p> |
|           | barcodevalue     | The Barcodes value                                                                                                                                |
|           | barcodeparastyle | Paragraph style for the barcode text                                                                                                              |
|           | barcodeswatch    | Swatch of the barcode                                                                                                                             |
| **table** | style            | Table style to apply                                                                                                                              |
|           | width            | Overall table width                                                                                                                               |
| **td/th** | colspan          | Column span                                                                                                                                       |
|           | rowspan          | Row span                                                                                                                                          |
|           | style/cellstyle  | Cell style                                                                                                                                        |
|           | width            | <p>Cell width measurement in points or a string with unit of measure, or:<br>FIXED<br>VARIABLE<br>FITTOTEXT</p>                                   |
|           | height           | Cell height measurement in points or a string with unit of measure                                                                                |
|           | vmerge           | <p>Vertical merge setting:<br>CONTENTMATCH<br>POPULATEDCONTENTMATCH</p>                                                                           |
|           | hmerge           | <p>Horizontal merge setting:<br>CONTENTMATCH<br>POPULATEDCONTENTMATCH</p>                                                                         |
|           | delete           | <p>Cell deletion option:<br>NEVER<br>IFEMPTY</p>                                                                                                  |
|           | valign           | <p>Vertical content alignment:<br>TOP<br>BOTTOM<br>MIDDLE</p>                                                                                     |
|           | rotation         | Cell content rotation                                                                                                                             |

Where the name of a tag matches the name of a **Formatting Rule**, then a singleton instance of this tag will insert the formatting rule into the text. so `<fr>` would insert a formatting rule called *fr* into the text.

**Allow All White Space**. By default HTML whitespace rules are obeyed. Enabling this option will prevent removal of any whitespace.

### Updates Preserve Local Formatting

Once a formatted field has been inserted into the document with this option checked, any subsequent use of the *Update Document* menu option will not apply the formatting specified by the tags in the field content. Instead, EasyCatalog will attempt to preserve any local formatting that has been applied to the field wherever possible.

### Embed Tags as Conditional Text

This option will preserve, where possible, formatting tags in the text.

### Ignore Whitespace Changes

When you select this option, minor modifications can be made to the field content once its placed in the document without marking it as *in error* in the panel. This includes the insertion of whitespace characters such as additional carriage returns, tabs, and spaces.

Moreover, when this option is enabled, the `Update Panel` menu will only update the field in the panel if non-whitespace characters have been modified. This helps prevent unnecessary updates and keeps the focus on significant changes.

You can specify which characters to ignore by listing them in the text field located beneath the check box. This field supports InDesign *metacharacters*, which allows you to include special characters like carriage returns and tabs in your list of ignored characters.

<table><thead><tr><th width="124">Code</th><th>Description</th></tr></thead><tbody><tr><td>^i</td><td>Indent to here</td></tr><tr><td>^y</td><td>Right indent tab</td></tr><tr><td>^t</td><td>Tab</td></tr><tr><td>^n</td><td>Forced line break</td></tr><tr><td>^p</td><td>End of paragraph</td></tr><tr><td>^S</td><td>Nonbreaking space</td></tr><tr><td>^-</td><td>Discretionary hyphen</td></tr><tr><td>^f</td><td>Flush space</td></tr><tr><td>^></td><td>En space</td></tr><tr><td>^m</td><td>Em space</td></tr><tr><td>^3</td><td>Third space</td></tr><tr><td>^4</td><td>Quarter space</td></tr><tr><td>^%</td><td>Sixth space</td></tr><tr><td>^/</td><td>Figure space</td></tr><tr><td>^s</td><td>Nonbreaking white space <em>(fixed widths)</em></td></tr><tr><td>^&#x3C;</td><td>Thin space</td></tr><tr><td>^|</td><td>Hair space</td></tr></tbody></table>

### Exclude from Panel Updates

The characters specified in the edit field will be excluded from the field content when using the `Update Panel` menu option. This feature is particularly useful if you need to prevent characters that are specific to InDesign, such as formatting or special control characters, from appearing in your data source content. By listing these characters, you ensure that they are ignored during updates, maintaining the integrity of your data without unwanted InDesign-specific characters.

### Preserve Whitespace on Update

EasyCatalog will attempt to retain the characters listed in the edit field during an `Update Document` operation. This is useful in scenarios where you need to manually insert characters that influence the text formatting in the document, and you do not want these characters to be removed during field updates. However, be aware that preserving the exact position of these characters may not always be possible, especially if the data source undergoes significant changes or requires extensive updates.


# Number

<figure><img src="/files/we6t1OR6FIYYxMnsR4Hc" alt="Field Options > Number"><figcaption><p>Field Options > Number</p></figcaption></figure>

Specify the number of decimal places required using the `Format` pop-up.


# Percentage

<figure><img src="/files/IkBlGPL4k1U1yWzoN70m" alt=""><figcaption><p>Percentage option</p></figcaption></figure>

Decimal values will be converted to percentages based on the number of decimal places specified in the `Format` pop-up menu. For instance, a decimal value of `0.1` will be displayed as `10%`. The `Format` setting allows you to control how many decimal places are included in the percentage, ensuring the output matches your desired precision.


# Currency

<figure><img src="/files/uZOFzA8keoNtaV2SDfxA" alt=""><figcaption><p>Currency option</p></figcaption></figure>

The `Format` pop-up offers several pre-defined currency formats for your convenience. If the currency you need is not listed, you can always use the [`Custom`](/setting-up-your-data/field-options/available-field-options/the-format-pane/custom) field type. This option allows you to specify various formatting details, such as the currency symbol, the type of decimal separator, and other relevant parameters, ensuring your currency values are displayed correctly.

At the bottom of the panel you can see an example of the currency format selected.


# Custom

If the available options do not meet your specific needs, this option allows you to define a number format. This can be done either by using a custom formatting string or by applying special keywords. This flexibility ensures that you can tailor the number format to match your precise requirements.

<figure><img src="/files/s2R901UvlKW1hYHa1VuT" alt=""><figcaption><p>Custom option</p></figcaption></figure>

Common formatting strings are defined in the `Example` pop-up. Where none of the examples are suitable you can define your own in the text field below.

A formatting string should be defined for when the field contains ➊ a positive number and ➋ a negative number. The two formatting strings are separated by a semi-colon.

The following characters have special meaning in format strings, all other characters will appear untranslated in the output.

<table data-full-width="false"><thead><tr><th width="132" align="center">Character</th><th>Meaning</th></tr></thead><tbody><tr><td align="center">#</td><td>The most used character, the ‘#’ indicates where digits from the source data should appear.</td></tr><tr><td align="center">.</td><td>Decimal point. Specifies where the decimal point should appear and, by the use of the ‘#’ character after the point, how many decimal places the number should be formatted to. No rounding will be performed on the value.</td></tr><tr><td align="center">,</td><td>May or may not be present as a divider between groups of digits, such as thousands, millions, etc.</td></tr><tr><td align="center">*</td><td>Used after the decimal point, this character indicates the minimum number of characters that must appear. For example, you can specify that a field must appear with at least two decimal places, but more will be output if required.</td></tr></tbody></table>

### Examples

The use of the formatting string is best explained by the use of examples:

<table data-full-width="false"><thead><tr><th width="138" align="center">Format String</th><th width="152">Original data</th><th width="145">Result</th><th>Explanation</th></tr></thead><tbody><tr><td align="center">$#.##</td><td>123456.123456</td><td>$123456.12</td><td>Only two positions are available after the decimal point.</td></tr><tr><td align="center">$###,###</td><td>123456.123456</td><td>$123,456</td><td>The comma may be used to separate groups of digits. No decimal point is provided in the format string, therefore the value will appear as a whole number.</td></tr><tr><td align="center">$#.####</td><td>123456.123456</td><td>$123456.1234</td><td>Four places are available after the decimal point – the output value is truncated, not rounded.</td></tr><tr><td align="center"># USD</td><td>123456.123456</td><td>123456 USD</td><td>As the characters ‘USD’ do not have any special meaning, they appear untranslated in the output.</td></tr><tr><td align="center">###.##*</td><td>123456.1</td><td>123456.10</td><td>Here, the position of the ‘*’ character specifies that a minimum of two decimal places are required.</td></tr><tr><td align="center">###.##*</td><td>123456.1234</td><td>123456.1234</td><td>Here, the position of the ‘*’ character specifies that a minimum of two decimal places are required.</td></tr></tbody></table>

### Custom formatting keywords

<table data-full-width="false"><thead><tr><th width="160">Keyword</th><th>Description</th><th>Example</th></tr></thead><tbody><tr><td>PREFIX</td><td>Specifies the characters to be inserted before the numeric content of the field.</td><td>[PREFIX=€]<br>The field will be prefixed with the euro symbol</td></tr><tr><td>SUFFIX</td><td>Specifies the characters to be appending to the numeric content of the field.</td><td>[SUFFIX=¢]<br>The field will have a ¢ suffix</td></tr><tr><td>DECIMAL</td><td>Specifies the decimal separator (radix point) character(s) to use.</td><td>[DECIMAL=,]<br>The decimal separator will be the comma - e.g. 199,99</td></tr><tr><td>PRECISION</td><td>Specifies the number of digits that will appear after the decimal point.</td><td>[PRECISION=2]<br>Values will be formatted to two decimal places</td></tr><tr><td>THOUSANDS</td><td>Specifies a character or characters to use to as the thousands separator. The thousands separator is used to divide the value into groups of three, right-to-left from the decimal point.</td><td>[THOUSANDS=.]<br>Values greater than a thousand will use a comma as a thousands separator.<br>e.g.: 1.234.567</td></tr><tr><td>REMOVE</td><td>Characters can be optionally removed when the content of the field matches the specified criteria.</td><td>[REMOVE=0.(&#x3C;1)]<br>For values less than 1, remove “0.”</td></tr></tbody></table>

The `Configure...` button can be used to automatically insert these formatting keywords. This feature simplifies the process of defining custom number formats by providing an easy way to input the necessary keywords, ensuring accurate and consistent formatting without manual entry.

<figure><img src="/files/I1W6naaWbWykRDGuFFLU" alt="Setup custom format" width="370"><figcaption><p>Configure option panel</p></figcaption></figure>


# Hyperlink

EasyCatalog can insert hyperlinks into your document, which will then appear when exported as an interactive PDF.

<figure><img src="/files/acucPh1WFVTsbNFfHoWq" alt=""><figcaption><p>Hyperlink panel option</p></figcaption></figure>

To insert a field as a hyperlink, change its type to be `Hyperlink` in the `Field Options` dialog.

The dialog is split into two sections: the top one determines what will appear in the document; the bottom one specifies the destination the user will be sent to when clicking on the hyperlink.

Custom field commands can be used in the `Text` and `URL` fields to retrieve content from other fields or dynamically build the URL.

### Text

When inserting a text-based hyperlink, the contents of this edit field will appear in the document. You can either use static text, or include the content of other fields.

{% hint style="warning" %}
This setting is ignored when inserting a hyperlink on an image box.
{% endhint %}

### URL

The URL for the hyperlink is specified in this box. You can include values from other fields by placing the field name within {brackets}. For example, if you include `{SKU}`, the content of the SKU field will be appended to the end of the hyperlink. Additionally, you can use `Custom Field` commands to construct the URL, allowing for dynamic and customized hyperlink generation based on your data fields.

#### Example

If you type *Click here* in the `Text` field and *FIELDSTR('Product URL')* in the `URL` field. When this field is inserted into the document, the text “Click Here” will appear which will be hyperlinked to the location specified in the “Product URL” field.&#x20;

{% hint style="info" %}
**When inserting an image field, the “Text” field will be ignored**.
{% endhint %}

### Hyperlinking to another page

EasyCatalog can insert hyperlinks that link to other pages in the document or, if the document is stored in an *InDesign Book*, to pages in other documents in the book.

The most common usage of this is to produce contents or index pages that link to the actual page in the document when the user clicks on an entry.

The first step is to update your panel so that each record knows which page it is placed on. Use the `Update panel with page numbers` menu option.

A special URI scheme is used to instruct EasyCatalog to hyperlink to another page: the prefix **ECPAGE://** is used.

```
ECPAGE://FIELDSTR('Product Page')
```

{% hint style="info" %}
The page you’re hyperlinking to must either be:

1. in the same document as the field you’re inserting
2. in the same InDesign book as the document you’re inserting into. Therefore, the document must be added to the InDesign book prior to inserting the hyperlink.
   {% endhint %}

### Bookmarks

An InDesign bookmark can also be created when inserting a field by prefixing the contents of the URL field with **BOOKMARK**:

```
BOOKMARK:FIELDSTR('My BookMark Field')
```

In the above example, the contents of the `text` field will be inserted into the document, setting a bookmark using the contents of the ‘*My Bookmark Field*’.

{% hint style="info" %}
**NOTE**: Bookmark hyperlinks are only supported when inserting text fields into the document, as InDesign does not support inserting a bookmark for images.
{% endhint %}


# Imported text

EasyCatalog can import various types of formatted text, ensuring a seamless integration with your design projects. Some of the supported formats include Rich Text Format (RTF), InDesign Tagged Text, and files created in Microsoft Word. This feature is particularly useful when dealing with pre-existing content that needs to be directly placed within your InDesign layout.

By setting the field type to `Imported Text`, users can either import the content from an external file or directly from the content of a specific field in your database. This ability significantly streamlines the workflow, allowing for a more efficient and organized process when handling complex data entries in your design projects.

EasyCatalog supports all of the text import types provided by InDesign.

{% hint style="danger" %}
Fields of type `Imported Text` will not be updated as part of the `Update Panel` operation.
{% endhint %}

<figure><img src="/files/Al0dORHU1iMUlzKWQpwn" alt=""><figcaption></figcaption></figure>

### Field content

If the contents of the field already contains the formatted content you want to place, select the `Field Content` radio button.

### Externally Referenced

If the field contains the name of a file to import, or a full path to a file, select the `Externally Referenced` radio button.

* **If the field contains a full path to the file to import**, no further information is required in the `Folder` and `Extension` fields.
* **If the field contains only the filename of the file to import**, specify the folder that contains the file in the `Folder` text box.
* **If the content of the field does not contain the file extension**, specify the file extension in the `Extension` text box.


# Date/Time

The format of the date/time stamps in the existing source data can be changed to anything you may need.

EasyCatalog also supports the re-formatting of date and time fields. By changing a field’s type to be `Date/Time`, EasyCatalog is able to sort data correctly in the panel. In some situations the output format should be the same as the input format: this is useful when the panel should be sorted by date or time.

Any date or time can be broken down into individual components called *specifiers*. Each specifier begins with a `%` symbol followed by a letter. For example, a four-digit year like 2025 is represented by `%Y`.

<figure><img src="/files/5u9TzZgBmEgS5Tava7HP" alt="Field Options panel > Format Pane > Date/Time"><figcaption><p>Field Options panel > Format Pane > Date/Time</p></figcaption></figure>

By combining multiple specifiers, you can define the format of any date or time. To do this effectively, you need to understand two key elements:

* **Input Format**: the structure of the original source data
* **Output Format:** the desired display format

Now, imagine your data source provides a date field with the following format: 12/24/2025 and you want to display it a more formal way, like Wednesday, the 24th of December, 2025. The value for import format should be `%m/%d/%Y`:

* `%m`: 12
* `%d`: 24
* `%Y`: 2025

And for the output format, you should type `%A, the %dth of %B, %Y`.

* `%A`: Wednesday
* `, the`: literal text
* `%d`: 24
* `th of`: literal text
* `%B`: December
* `%Y`: 2025

### List of specifiers

<table><thead><tr><th width="219.6484375">Specifier</th><th width="292.6796875">Description</th><th>Example</th></tr></thead><tbody><tr><td>%d-%m-%y %H:%M:%S</td><td>Year represented by 2 digits.<br>day-month-year hours:minutes:seconds</td><td><code>17-06-19 09:11:47</code></td></tr><tr><td>%Y-%m-%d %H:%M:%S</td><td>Year shown in full.<br>year-month-day hours:minutes:seconds</td><td><code>2019-06-17 09:11:47</code></td></tr><tr><td>%y-%m-%d %H:%M:%S</td><td>Year represented by 2 digits.<br>year-month-day hours:minutes:seconds</td><td><code>19-06-17 09:11:47</code></td></tr><tr><td>%d/%m/%Y</td><td>day/month/year</td><td><code>17/06/2019</code></td></tr><tr><td>%m/%d/%Y</td><td>month/day/year</td><td><code>06/17/2019</code></td></tr><tr><td>%d/%A/%Y</td><td>day/abbreviated weekday name/year</td><td><code>06/Mon/2019</code></td></tr><tr><td>%Ec</td><td>Current date&#x26;time on your computer</td><td><code>6/17/2019 9:11:47AM</code></td></tr><tr><td>%a</td><td>Abbreviated weekday name</td><td><code>Thu</code></td></tr><tr><td>%A</td><td>Full weekday name</td><td><code>Thursday</code></td></tr><tr><td>%b</td><td>Abbreviated month name</td><td><code>Aug</code></td></tr><tr><td>%B</td><td>Full month name</td><td><code>August</code></td></tr><tr><td>%c</td><td>Date and time representation</td><td><code>Thu Aug 23 14:55:02 2001</code></td></tr><tr><td>%C</td><td>Year divided by 100 and truncated to integer (00-99)</td><td><code>20</code></td></tr><tr><td>%d</td><td>Day of the month, zero-padded (01-31)</td><td><code>23</code></td></tr><tr><td>%D</td><td>Short MM/DD/YY date, equivalent to %m/%d/%y</td><td><code>08/23/01</code></td></tr><tr><td>%e</td><td>Day of the month, space-padded ( 1-31)</td><td><code>23</code></td></tr><tr><td>%F</td><td>Short YYYY-MM-DD date, equivalent to %Y-%m-%d</td><td><code>2001-08-23</code></td></tr><tr><td>%g</td><td>Week-based year, last two digits (00-99)</td><td><code>01</code></td></tr><tr><td>%G</td><td>Week-based year</td><td><code>2001</code></td></tr><tr><td>%h</td><td>Abbreviated month name (same as %b)</td><td><code>Aug</code></td></tr><tr><td>%H</td><td>Hour in 24h format (00-23)</td><td><code>14</code></td></tr><tr><td>%I</td><td>Hour in 12h format (01-12)</td><td><code>02</code></td></tr><tr><td>%j</td><td>Day of the year (001-366)</td><td><code>235</code></td></tr><tr><td>%m</td><td>Month as a decimal number (01-12)</td><td><code>08</code></td></tr><tr><td>%M</td><td>Minute (00-59)</td><td><code>55</code></td></tr><tr><td>%n</td><td>New-line character (‘\n’)</td><td></td></tr><tr><td>%p</td><td>AM or PM designation</td><td><code>PM</code></td></tr><tr><td>%r</td><td>12-hour clock time</td><td><code>02:55:02 pm</code></td></tr><tr><td>%R</td><td>24-hour HH:MM time, equivalent to %H:%M</td><td><code>14:55</code></td></tr><tr><td>%S</td><td>Second (00-61)</td><td><code>02</code></td></tr><tr><td>%t</td><td>Horizontal-tab character (‘\t’)</td><td></td></tr><tr><td>%T</td><td>ISO 8601 time format (HH:MM:SS), equivalent to %H:%M:%S</td><td><code>14:55:02</code></td></tr><tr><td>%u</td><td>ISO 8601 weekday as number with Monday as 1 (1-7)</td><td><code>4</code></td></tr><tr><td>%U</td><td>Week number with the first Sunday as the first day of week one (00-53)</td><td><code>33</code></td></tr><tr><td>%V</td><td>ISO 8601 week number (00-53)</td><td><code>34</code></td></tr><tr><td>%w</td><td>Weekday as a decimal number with Sunday as 0 (0-6)</td><td><code>4</code></td></tr><tr><td>%W</td><td>Week number with the first Monday as the first day of week one (00-53)</td><td><code>34</code></td></tr><tr><td>%x</td><td>Date representation</td><td><code>08/23/01</code></td></tr><tr><td>%X</td><td>Time representation</td><td><code>14:55:02</code></td></tr><tr><td>%y</td><td>Year, last two digits (00-99)</td><td><code>01</code></td></tr><tr><td>%Y</td><td>Year</td><td><code>2001</code></td></tr><tr><td>%z</td><td>ISO 8601 offset from UTC in timezone (1 minute=1, 1 hour=100)<br>If timezone cannot be determined, no characters</td><td><code>+100</code></td></tr><tr><td>%Z</td><td>Timezone name or abbreviation<br>If timezone cannot be determined, no characters</td><td><code>CDT</code></td></tr><tr><td>%%</td><td>A % sign</td><td><code>%</code></td></tr></tbody></table>

{% hint style="danger" %}
If the incorrect Input Format is specified, the field's content will be set to '???'
{% endhint %}

### Prefix for other languages

Dates can be prefixed to support other spoken languages.

Month and weekday names are automatically localized when formatting dates. By default, they follow the language set in your InDesign user interface. However, you can override this by prefixing the date format with the desired language. For example:

```
[es_ES]%d %B %Y
```

For the above setting, if your field content is `23/04/2025` and the input format is `%d/%m/%Y` the field content will be displayed with Spanish month names: `23 abril 2025`.


# Barcode

EasyCatalog includes support for all major barcode types.

The **Barcode** field allows a quick and convenient way to create many types of barcodes into an image frame from a field.

<figure><img src="/files/d94M9I3Ur7iu5PQFwW4N" alt="Field Options > Format pane > Barcode dialog box"><figcaption><p>Field Options > Format pane > Barcode dialog box</p></figcaption></figure>

### List of supported Barcodes

* EAN5
* EAN8
* EAN13
* EAN14
* Code 39
* Code 128
* GS1-128
* UPCA
* I2Of5
* Data Matrix
* [QR Code](/setting-up-your-data/field-options/available-field-options/the-format-pane/qr-code)

The following QR code types are supported:

* Text
* URL

The following QR codes can also be inserted, but a custom field needs to be created first in order to collect the necessary data:

* Business/vCard
* SMS
* Email

### Barcode color

Choose a color from the list. EasyCatalog will display all color swatches defined in your document.

### Output human-readable text

Enable this option to display the barcode text beneath the graphic. Then, select a paragraph style from the `Paragraph Style` dropdown menu.

### Inserting barcodes

To insert a field as a barcode:

1. Edit the field’s Field Options using the *Field Options* menu from the data panel’s pop-out menu
2. On the “*Format*” pane, change the field’s type to be “*Barcode*“
3. Select the barcode type from the *Barcode Type* pop-up.

The field will now be treated in the same way as an image field, so to insert the barcode insert the field into an image box or assign a `Field Specifier` for this field to an image box.


# QR Code

The contents of a field can be output as a QR Code using InDesign’s QR Code functionality.

EasyCatalog includes support for all of the QR Code types supported by InDesign, although some types require the use of a custom field to provide the content of the QR Code.

EasyCatalog version 18 and newer includes support for QR Codes as a [barcode](/setting-up-your-data/field-options/available-field-options/the-format-pane/barcode) type in `Field Options`; for previous versions, QR codes can be generated using LUA script attached to an image frame.

### URL/Hyperlink QR Codes

If one of your fields contains a URL, it can be output as a QR code:

{% stepper %}
{% step %}
Edit the `Field Options` for the field (use the `Field Options` menu from the data panel’s pop-out menu)
{% endstep %}

{% step %}
Click on `Format` on the left of the dialog
{% endstep %}

{% step %}
Change the field’s type to be `Barcode`
{% endstep %}

{% step %}
Change the type of barcode to be `QR Code`
{% endstep %}

{% step %}
You can also specify the name of a swatch that will be used to generate the QR code.
{% endstep %}
{% endstepper %}

The field can now be inserted into an image box, and the QR code will be generated.

### Text QR Codes

If you need to output text as a QR Code, follow the instructions above for URL/Hyperlink QR Codes.

### Email QR Codes

Email QR codes require three fields: `email address`, `subject` and `email body`. To generate an e-mail QR code, you must first create a custom field that takes these three fields and generates a string suitable for output as a QR code:

{% stepper %}
{% step %}
Create a new custom field

Right click in the panel and use the `New Custom Field` option, or use the `New Custom Field` option from the `Field Options` menu
{% endstep %}

{% step %}
Give the new field a name at the top of the dialog

E.g. `email QR Code`
{% endstep %}

{% step %}
Use the `QRCODEENCODEEMAIL` custom field command

For example, if you have three fields in your data containing the `email` address, `subject` line and `email-body` contents you would use:

```
QRCODEENCODEEMAIL(FIELDSTR(email), FIELDSTR(subject), FIELDSTR(email-body))
```

{% endstep %}

{% step %}
Click on `Format` on the left of the dialog
{% endstep %}

{% step %}
Change the field’s type to be `Barcode`
{% endstep %}

{% step %}
Change the type of barcode to be `QR Code`
{% endstep %}
{% endstepper %}

The field can now be inserted into an image box, and the QR code will be generated.

### SMS QR Codes

SMS QR codes require two fields: telephone number and message body. To generate an SMS QR code, you must first create a custom field that takes these two fields and generates a string suitable for output as a QR code:

{% stepper %}
{% step %}
Create a new custom field

Right click in the panel and use the N`ew Custom Field` option, or use the `New Custom Field` option from the `Field Options` menu
{% endstep %}

{% step %}
Give the new field a name at the top of the dialog

e.g. “SMS QR Code”
{% endstep %}

{% step %}
Use the `QRCODEENCODESMS` custom field command

For example, if you have two fields in your data containing `telephone` number and text `message` body you would use:

```
QRCODEENCODESMS(FIELDSTR('telephone'),FIELDSTR('message'))
```

{% endstep %}

{% step %}
Click on `Format` on the left of the dialog

{% endstep %}

{% step %}
Change the field’s type to be `Barcode`
{% endstep %}

{% step %}
Change the type of barcode to be `QR Code`
{% endstep %}
{% endstepper %}

The field can now be inserted into an image box, and the QR code will be generated.

### VCard QR Codes

QR codes can also be generated that represent a virtual business card (VCard).

{% stepper %}
{% step %}
Create a new custom field

Right click in the panel and use the “New Custom Field” option, or use the “New Custom Field” option from the Field Options menu
{% endstep %}

{% step %}
Give the new field a name at the top of the dialog

e.g. “VCard QR Code”
{% endstep %}

{% step %}
The `QRCODEENCODEVCARD` custom field command accepts the following parameters **in this order**, although only First and Last Name are mandatory:

* First name
* Last name
* Address
* City
* State
* Zip
* Country
* Telephone
* Cell phone
* Email,
* Website,
* Job title,
* Organization
  {% endstep %}

{% step %}
Fields that are not required should be left empty.

For example, if you have fields containing the first and last name, address, city and telephone you would use a command such as:

```
QRCODEENCODEVCARD(FIELDSTR(first name),FIELDSTR(last name), FIELDSTR(address), FIELDSTR(city),'','','',FIELDSTR(telephone))
```

{% endstep %}

{% step %}
Click on `Format` on the left of the dialog
{% endstep %}

{% step %}
Change the field’s type to be `Barcode`
{% endstep %}

{% step %}
Change the type of barcode to be `QR Code`
{% endstep %}
{% endstepper %}


# Formatting rule


# Tabular